Graphic Redesign & Other Updates
BIG updates since I last posted. Its been a long time since the last post and I HAVE been working on this project some, just not updating things so much because I had so many things to change. But I am finally done with the major changes so now here I am again! The first major change is something that’s both sort of exciting but also, in a way, a tad disappointing because it’s not exactly what I wanted. But it’ll make things easier on me (which is why I did it) and it also brings it back to how…
Keep readingGraphical Effects (Roof/Walls/Outlines)
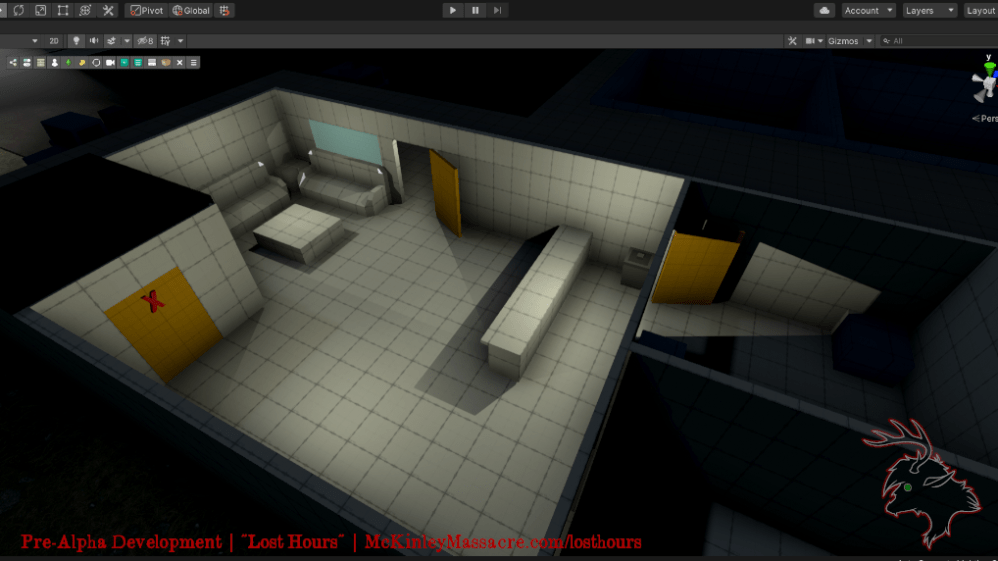
I’ve done some graphical updates for these videos, so it’s more visually appealing to play, better fits the style of the game, and to help the player view things with less obstruction. The Environment: Ugly motel carpeting! I didn’t make this, it was a free texture from GameTextures.com 😛 I will probably replace it with my own in the future….but I do really like it haha! I also added a shader to the environment models so they have a “line art” effect to keep in context with the comic book-esque/cartoon feel. If you notice the corkboard on the wall in…
Keep readingExploration Gameplay Basics (3 Videos)
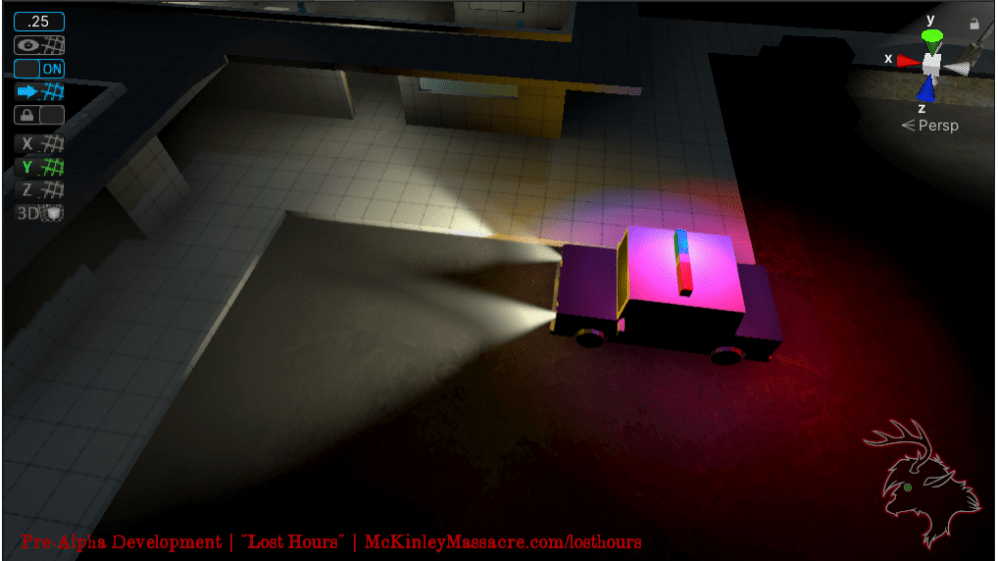
I’ve added a lot to this from the last time we’ve seen progress! And I’ve included 2 more videos to show subsequent updates without spamming posts on my website. I’m also now adding bold titles to each paragraph to help people see the updates I’ve made in each post and keep it all looking nice and clean. The HUD: The video above (progression #1) features a slightly updated HUD, but still non-functional attributes. But it’s one step closer to be hooked up and working. The Flashlight: Has officially been updated to a more realistic lighting effect via the Volumetric Light…
Keep readingBasic Inventory System (Flashlight)
I made a few minor adjustments to the HUD here, but nothing is functional yet; it wasn’t my main focus. I made a custom skin (still a very much a WIP) for Game Creator’s Inventory system (had not made one for “containers” as of yet) and managed to get the flashlight object I had made as a working equippable. This was actually quite a complicated little thing to do.The flashlight I created was saved as a prefab, and was not yet instantiated into the game at the beginning. Once you equip the flashlight, it instantiates the flashlight prefab as a…
Keep readingCutscene Practice
This was an exciting one: cutscenes! I initially had literally no idea how to do this, and it took a good while to figure it out and get a lot right. I had to learn Unity Timelines, and I grabbed the free asset Cinemachine to handle the cameras (which I do have a few issues with; you’ll see the jump at the end of the cutscene when it transfers to gameplay). That jump was mostly remedied later on, but it’s very difficult to fix, and so I will be looking for other ways, possibly just Game Creator cameras, to construct…
Keep readingMain Menu Testing (2 Videos)
I took a break at this point from the main game to mess around with making a main menu so I could get in some other UI work beyond the journal system. This worked great but it felt really….simple? Of course, I’m just starting out here, but it just felt too basic even for beginner standards. So I did something really simple: fading effects. It’s amazing how much that added to it, right?Bonus: you get a bit of a game start at the end of this video! Not working, of course, but we’ll get there 😉 The original main menu…
Keep readingJournal Added (and SFX!)
It took me quite a while to get this tab thing right, and I might actually change it in the future. But either way, I’m glad I managed to figure it out and set it all up cleanly! The way I set this up was fluid and worked nicely, but later on I realized it was not as nice as it could be, so in the future I will share the new setup for this (actually showing the Unity interface this time so you can see the way it’s constructed). I also added some nighttime sound effects to the background…
Keep readingRoad to Motel Basics
The HUD featured here was a placeholder only; non-functional. The flashlight implemented in this also had no inventory mechanic whatsoever, rather it was just a lighting effect place onto the character that could be switched on and off. An inventory system had yet to be created. You can see how jittery it is, as it’s moving purely with the characters movement; you can’t move it independently. I changed this in the future! The dialogue (also called”barks”, which are essentially character shouts) were created using the Game Creator “floating messages” system, which I gave my own custom skin to make them…
Keep readingPrototyping and Test Areas
Note: The featured content was made in early December of 2020. I don’t have a lot of saved videos or images from before then. The first image was my starting test area that I worked with for a good long time before moving on. It went through a couple of iterations, none of which I have saved, sadly. What you see here is a further along version. I had originally played around a lot with an isometric camera, which gave the game a much more 2D feel, but finally decided on the standard perspective camera to help give the game…
Keep reading