
The conversion from the prototype to the final piece took far longer than I thought it would, and I took a lot of breaks working on it, but it’s finally done!
I had to do a lot of reworking as I went along; I realized I wasn’t happy with some of the design (such as thinking maybe the neck was a little too thick, as I still need to put a thing layer of foam over the whole thing), and some of it wasn’t quite working as well I wanted it.
The Neck
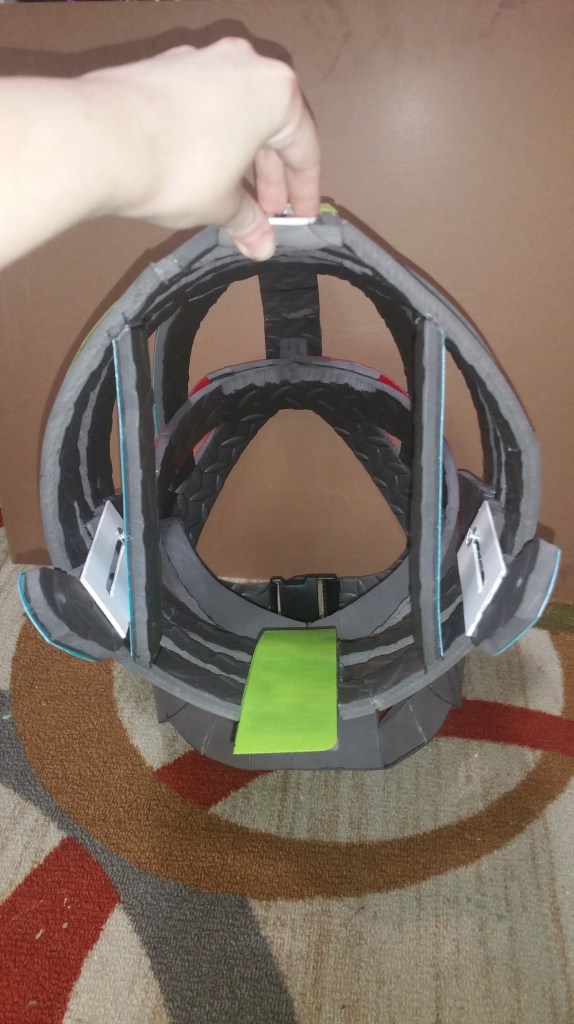
The issues I had were due to some of the design around where my head sat in the back of his neck. The arches I made, while structurally necessary to keep the whole thing sturdy, were too close to the interior helmet design I have to wear on the inside, resulting in restricted movement, so I had to redesign some of that (a few different times in some places, oof). Picture below is the original design, and then afterward is the edited (final) design.
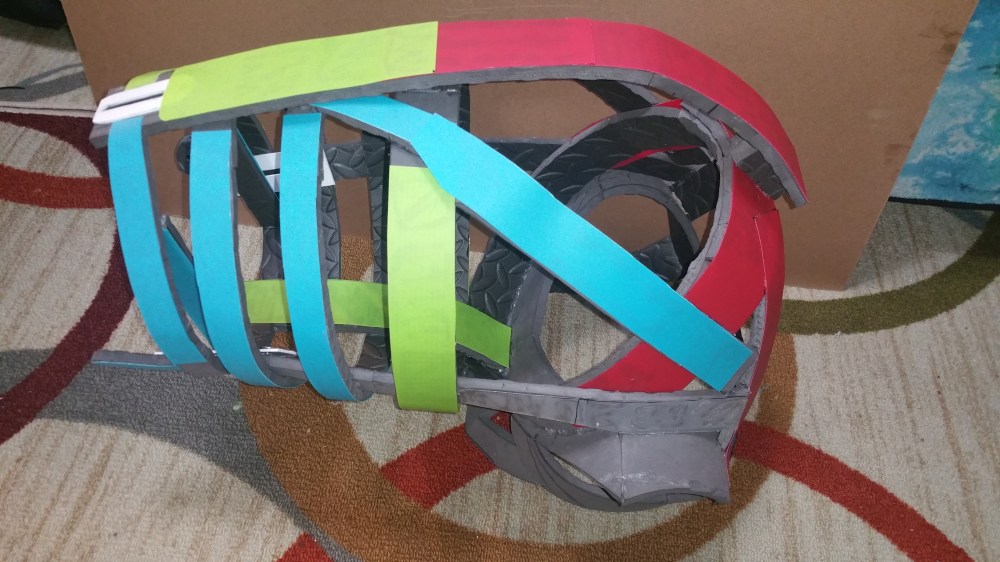
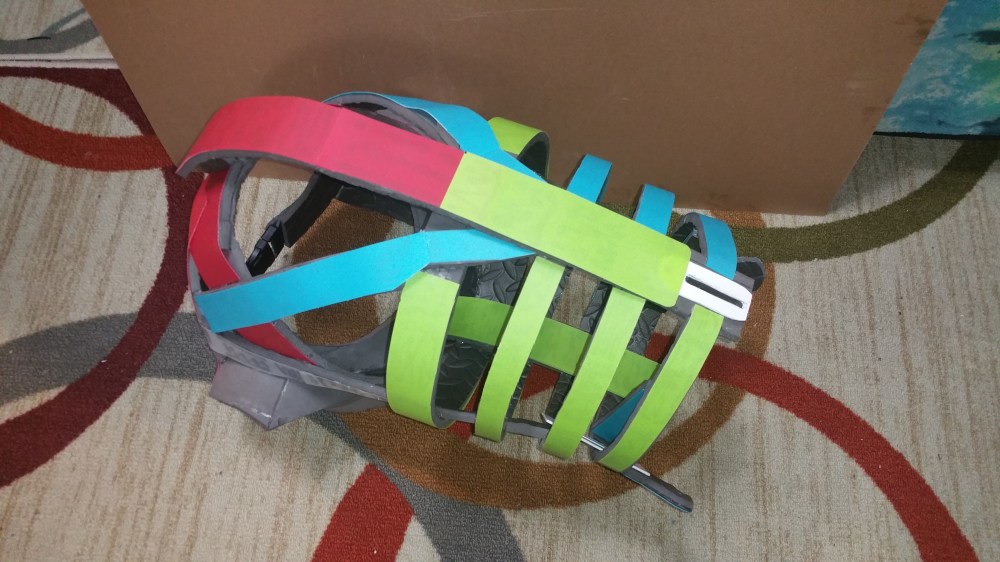
Below is a gallery of my initial design.
Note: The first couple of pictures were before I placed the coloured plastic bits over the EVA, just to show the progress and that they are in fact EVA strips, just with plastic reinforcement added on top.

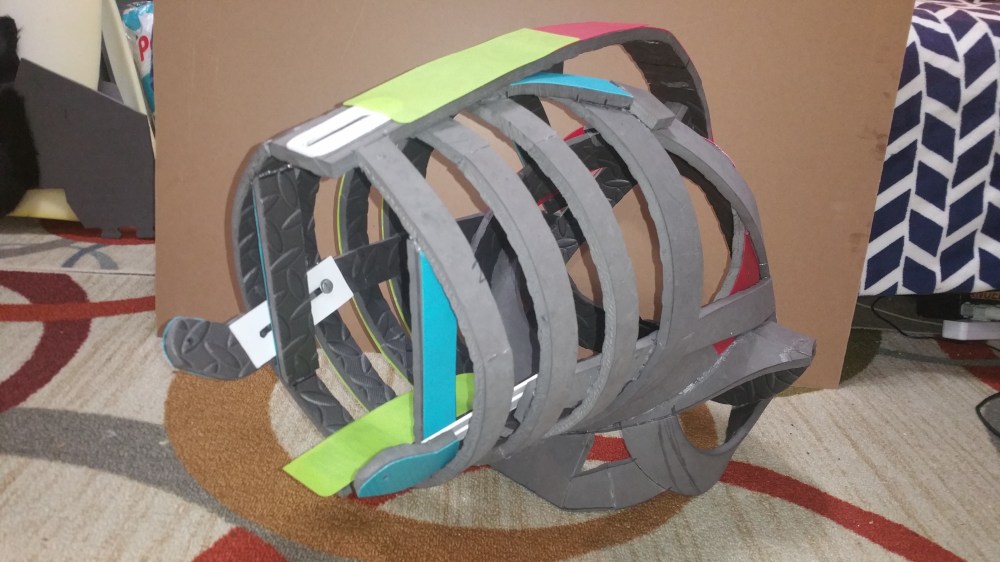


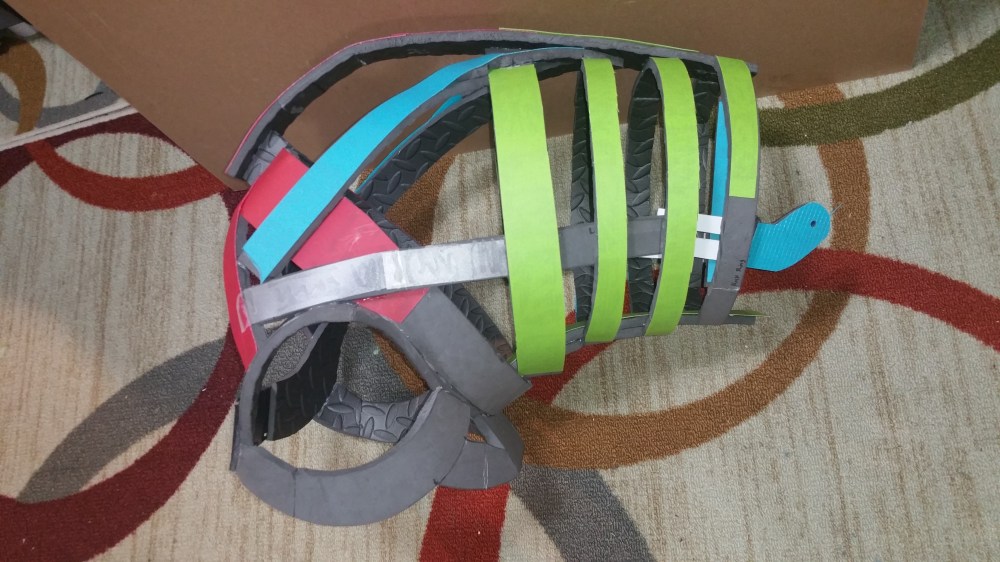
I’ll get to what those weird white railings are in a little bit.
The red part (his “spine”) and the blue pieces coming off of it from the back are what needed to be altered, and I also was forced to remove the two vertical braces near the head connection area. This was because the interior rods connected to the helmet bumped into them (I failed to consider just how far those rods needed to move left and right for his head to move enough to be noticeable).
While I was messing with this, I also cut the rings from the top and brought them in a little more; you won’t be able to really see this alteration, all it did was make the neck a little thinner but the seams are hidden underneath the spine.
I also took the time to play around a lot more with the movement mechanisms, which are those little white plastic pieces on the side and top of the neck. I actually removed these at one point and tried a lot more things, from elastic, to simple EVA rods, to an actual multi-hinge setup using screw posts for extra pivoting points. None of them worked the way I wanted so I returned to the PVC railing I had made first.
I went with the head-only pivot design (no neck movement) for the main reason of Obstagoon’s actual design in-game. At one point I added railings along the sides of the rings so that the rings themselves actually compressed and stretched so the entire neck moved, not just the head. This was a cool result, but Obstagoon isn’t actually shown as having this kind of movement; instead, his head pivots on the end of his neck. It may not be 100% realistic, but it’s generally how a creature like this would move (there would of course still be some neck movement on a real animal but the head movement would be much more noticeable) so I went with it.
I also slightly modified the front of the chest area to alter how it sat on my shoulders a bit. I felt the neck was a little too far forward and down, so when I hunched over even slightly it was pointed sorta toward the ground. It didn’t take much, but it seems to fit a little nicer now and the neck sits in a good position. The interior padding I will add later will help move it up and out a little bit as well.
After all of the editing and reconstruction, the final neck build looks like this (without lining and other finishing details):


The Head
Next was his head, which started out as very basic EVA foam shapes glued together (I made a pattern based on my cardboard mockup). It fit together kinda haphazardly near the side there, my oopsies, but I filled it in with putty later so all is well!

This piece also went through a lot of small edits, such as the back of the head where it attaches to the neck. But once all that was worked out, I reinforced important areas with plastic (the hinge area with PVC for strength and the general foam with the styrene). I also realized after the fact that I should have cut the eyes out initially but somehow I forgot :’D I managed though. Yay box cutters!
After I was done with the basic shape and reinforcing some specific parts for durability, I sanded some edges to make it smoother and filled in some cracks with foam putty. That last part doesn’t matter much but it makes me feel better not having weird gaps in-between places I needed edit.
This is the final result for the headbase (no ears yet):


The wires and metal bars coming out of the back will make sense very shortly! There are also a few very minor asymmetries, but these will be fixed/unnoticeable when I go to add detail foam over this ‘skull’.
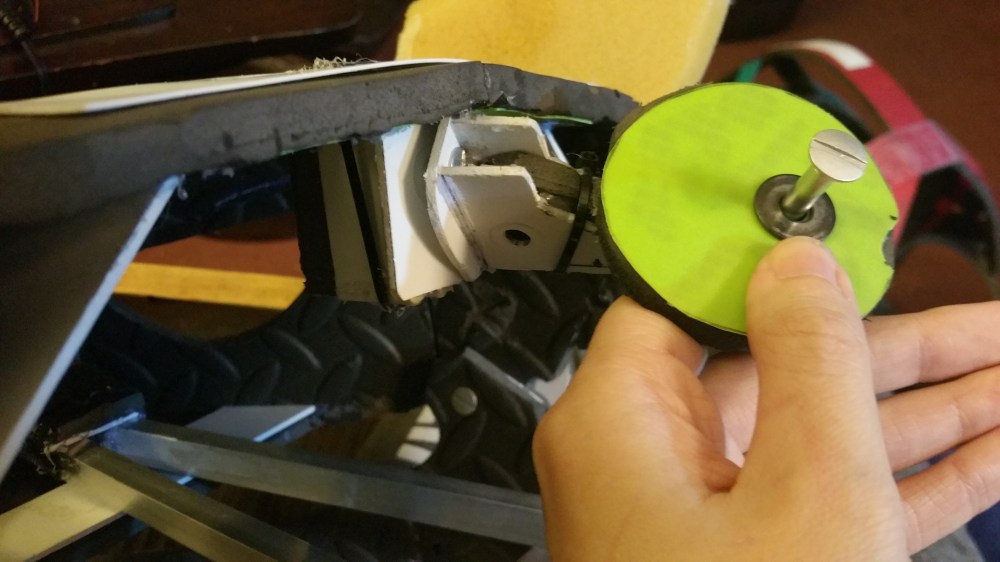
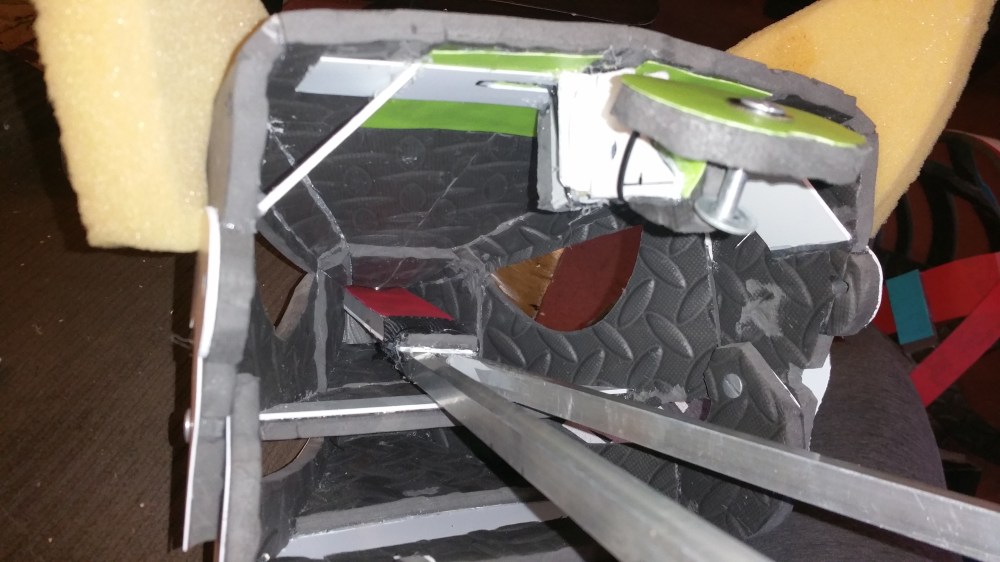
As for the other weird things you may notice, the white railing on the top of his head was leftover from my experimenting with hinges. I left it because it added some structural integrity to the back of the head. The final hinge is underneath it and is glued (with Barge and hot glue) and zip-tied to the head. The hinge itself has a hinge, too, for extra movement! This was done with a loose fitting screw post so the head can turn left and right and up and down from that point as well as the sides of the neck. Here’s a closeup picture of that area so it’s (hopefully) a little more clear.
This area is reinforced on both sides via that railing on the top and some plastic on the inside. It’s zip-tied to a piece of plastic I used to fill in part of the railing. The hinge itself is also zip-tied which is again left over from my experimentation. At an earlier point that EVA piece in the center of the sandwiched PVC pieces moved up and down but I decided to make that part static and instead went with the two-piece hinge idea for added rotation.
The rest of the PVC board you’re seeing in the head is just for integrity. He is all over very sturdy!
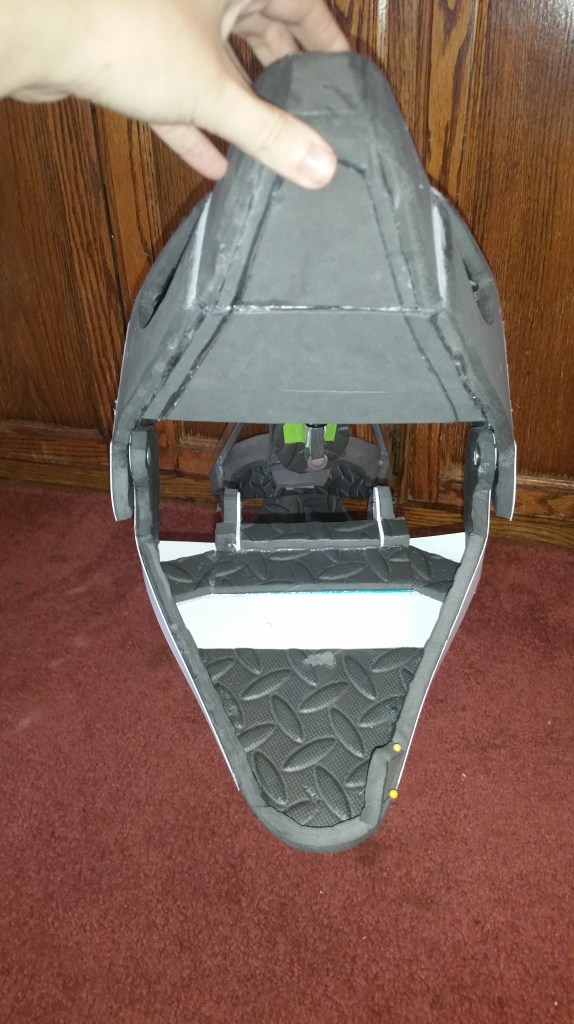
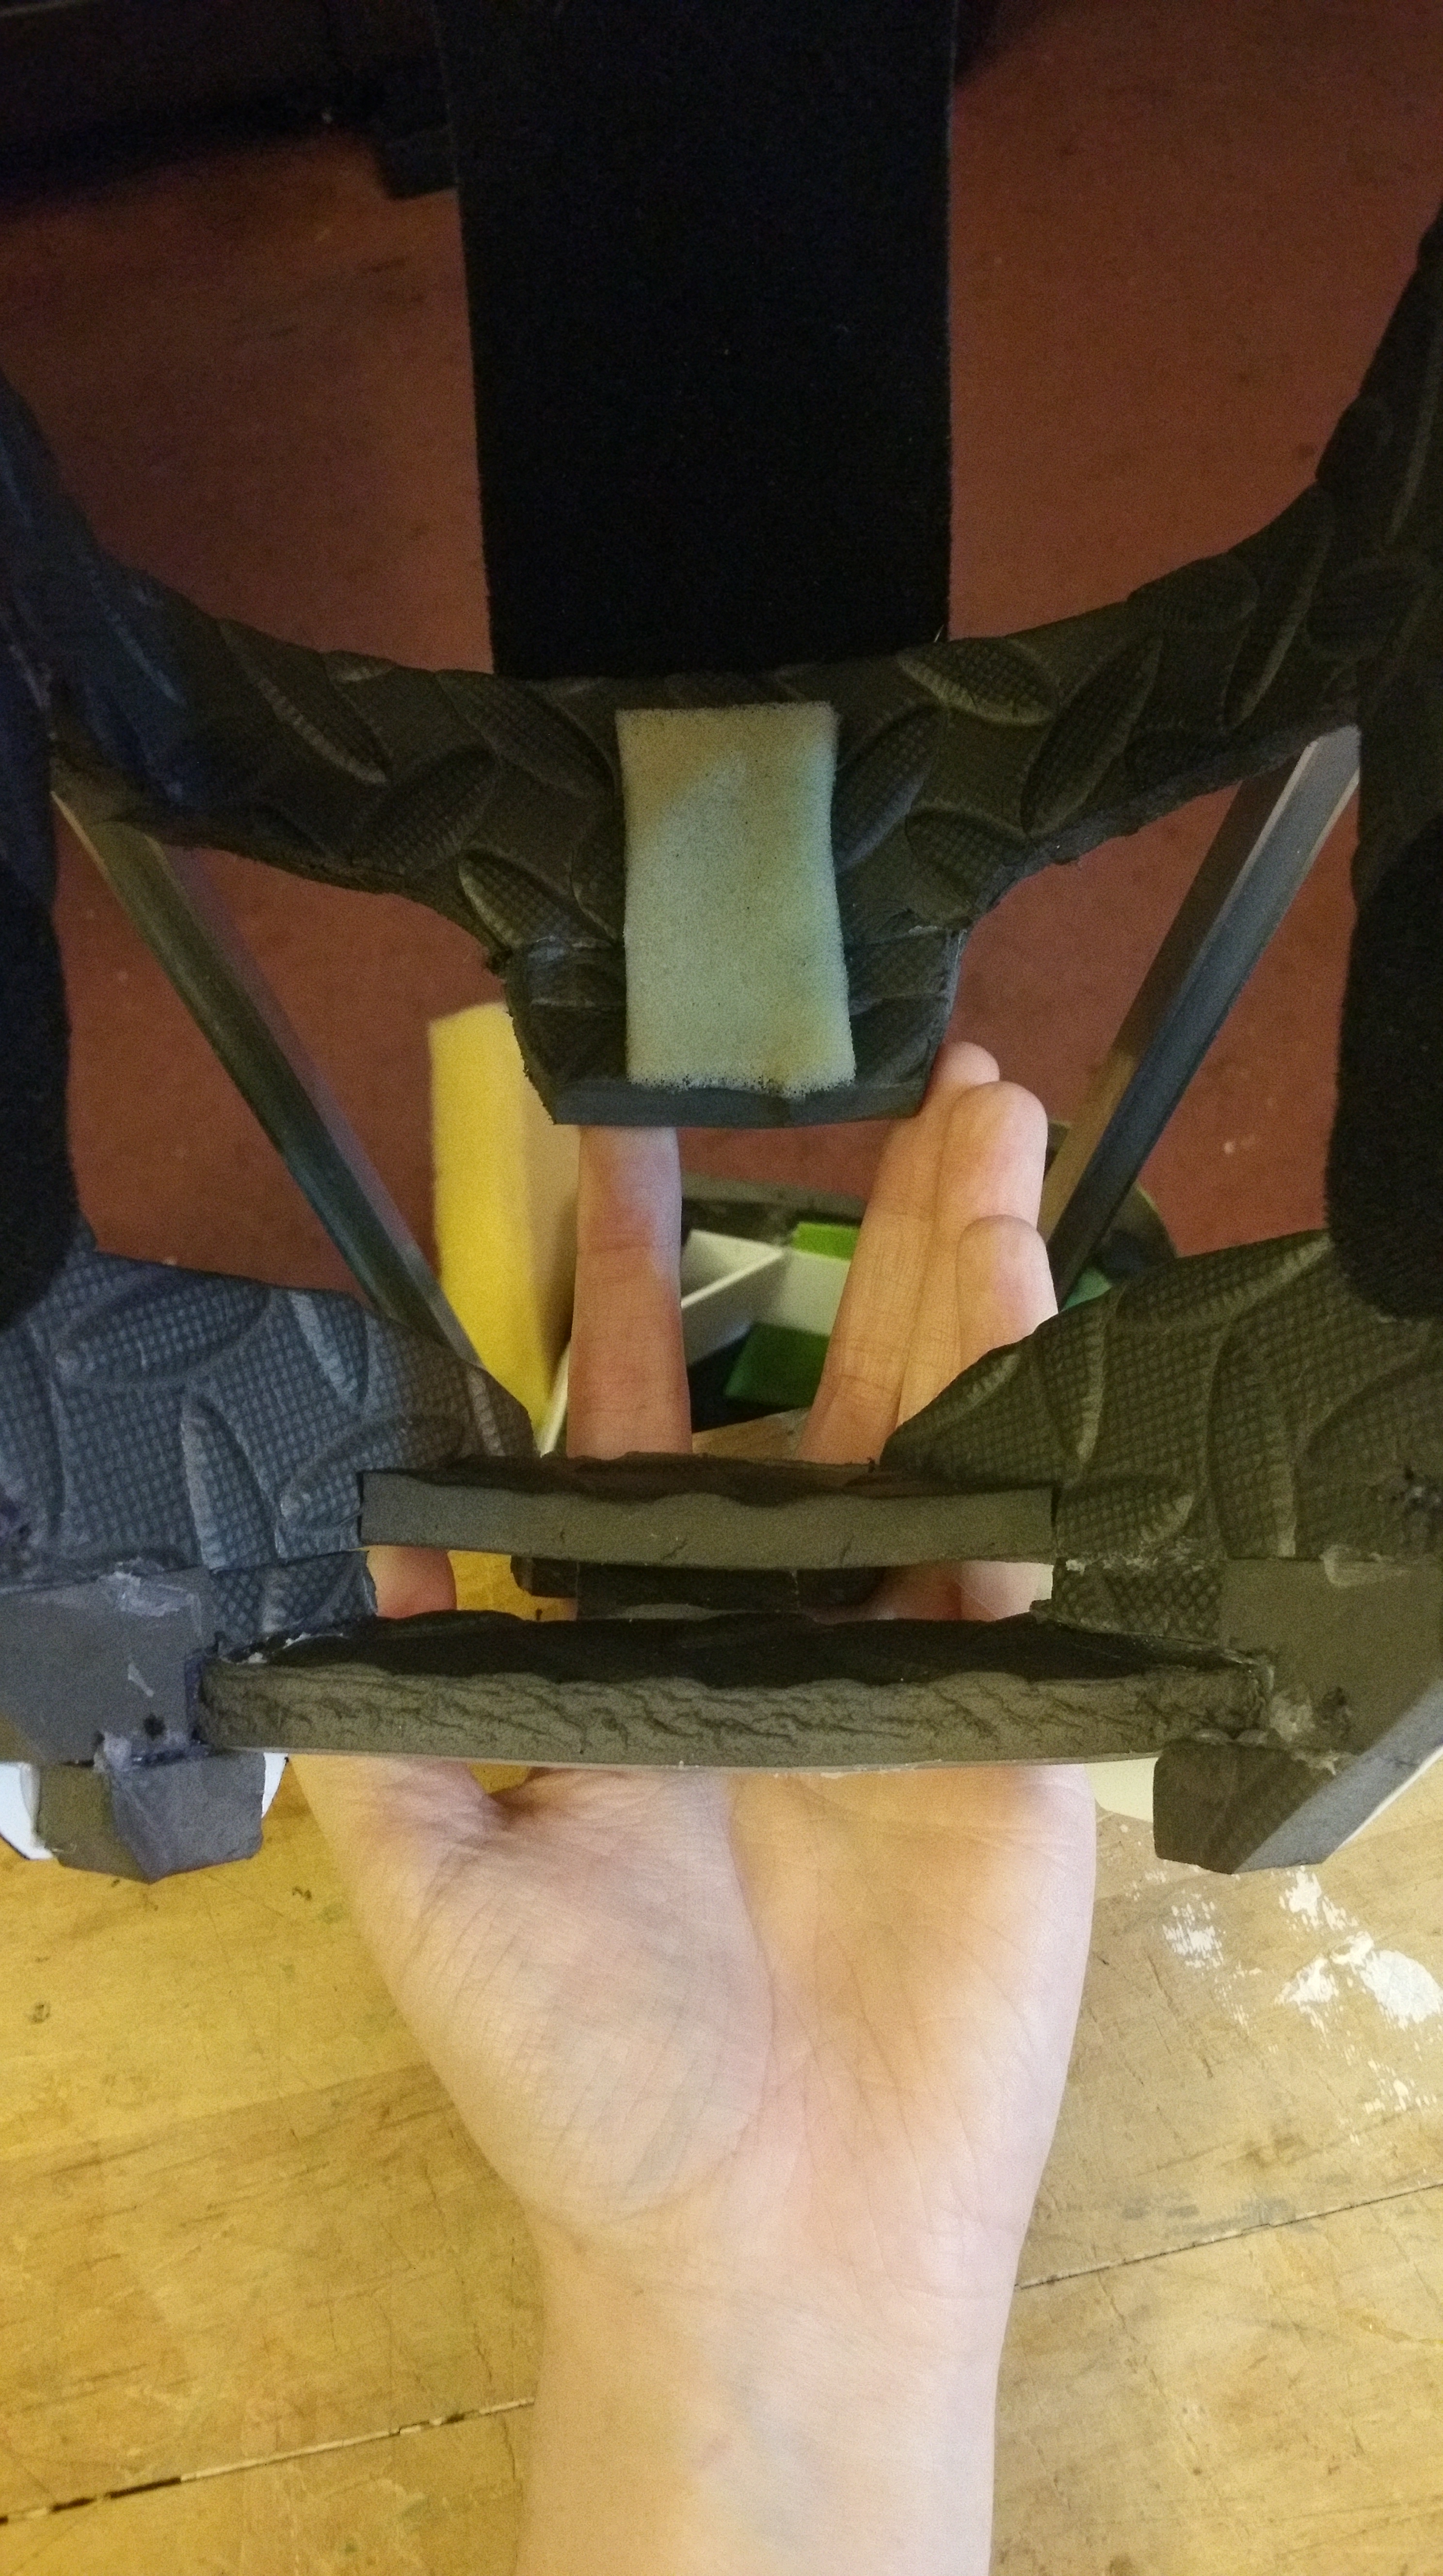
The Interior Headpiece
I constructed this much different from my initial design because what I had didn’t quite work the way I wanted, at least for the jaw. The jaw had a lot of unwanted movement to it and when moving my head up or down, the jaw did not respond adequately.
It took me a lot of trial and error to get all of this work, but eventually I got it all up and running as I wanted it. It’s constructed as a basic helmet with a moving jawpiece that has two tiers set into it (visible in the gallery). One is for my jaw to sit on, and the other is slightly higher and presses against my chin. This is because the jaw is a push/pull mechanism; there is no elastic!

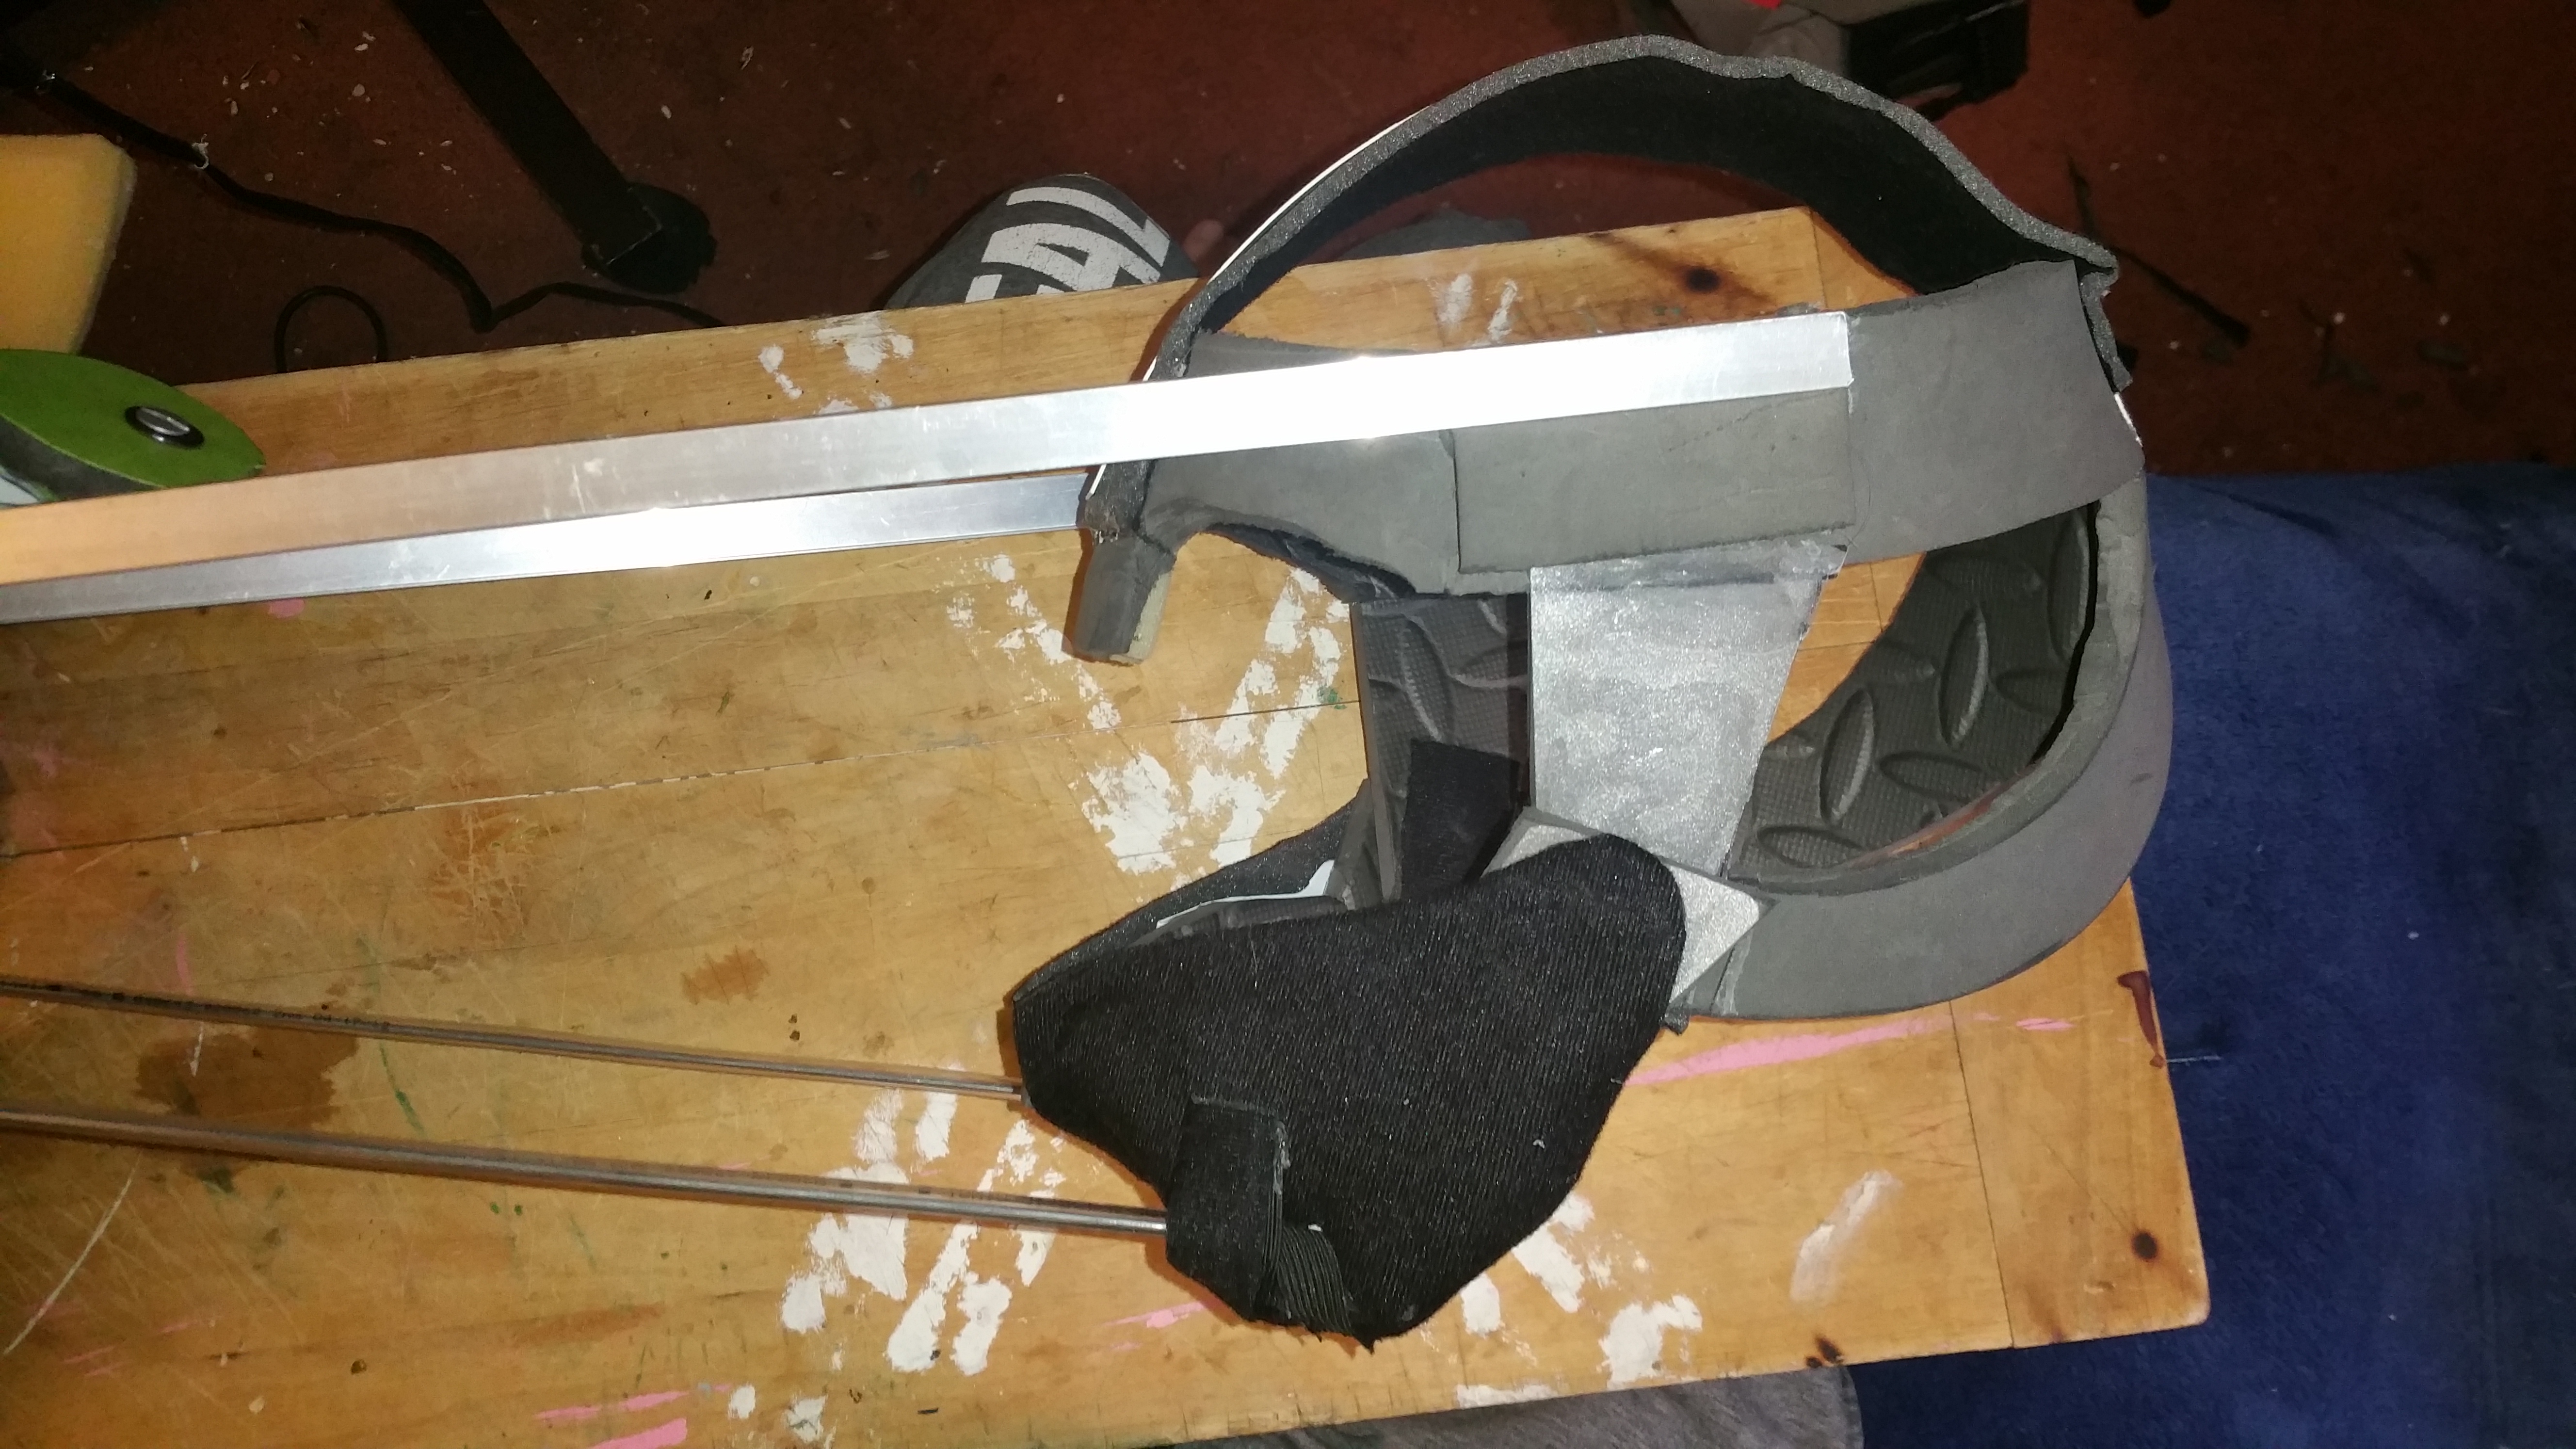
You’ll notice the wires coming out of the jaw. These hook directly into those weird loops at the back of Vandal’s jaw. Both ends are able to rotate where they’re connected, which was a very important piece, and that’s how the smooth jaw movement works (video at the end!). When I close my mouth, the jaw returns to being closed because that piece in front of my chin is pressed and pulls the helmet jaw back up, which in turn pushes Vandal’s jaw back into place.
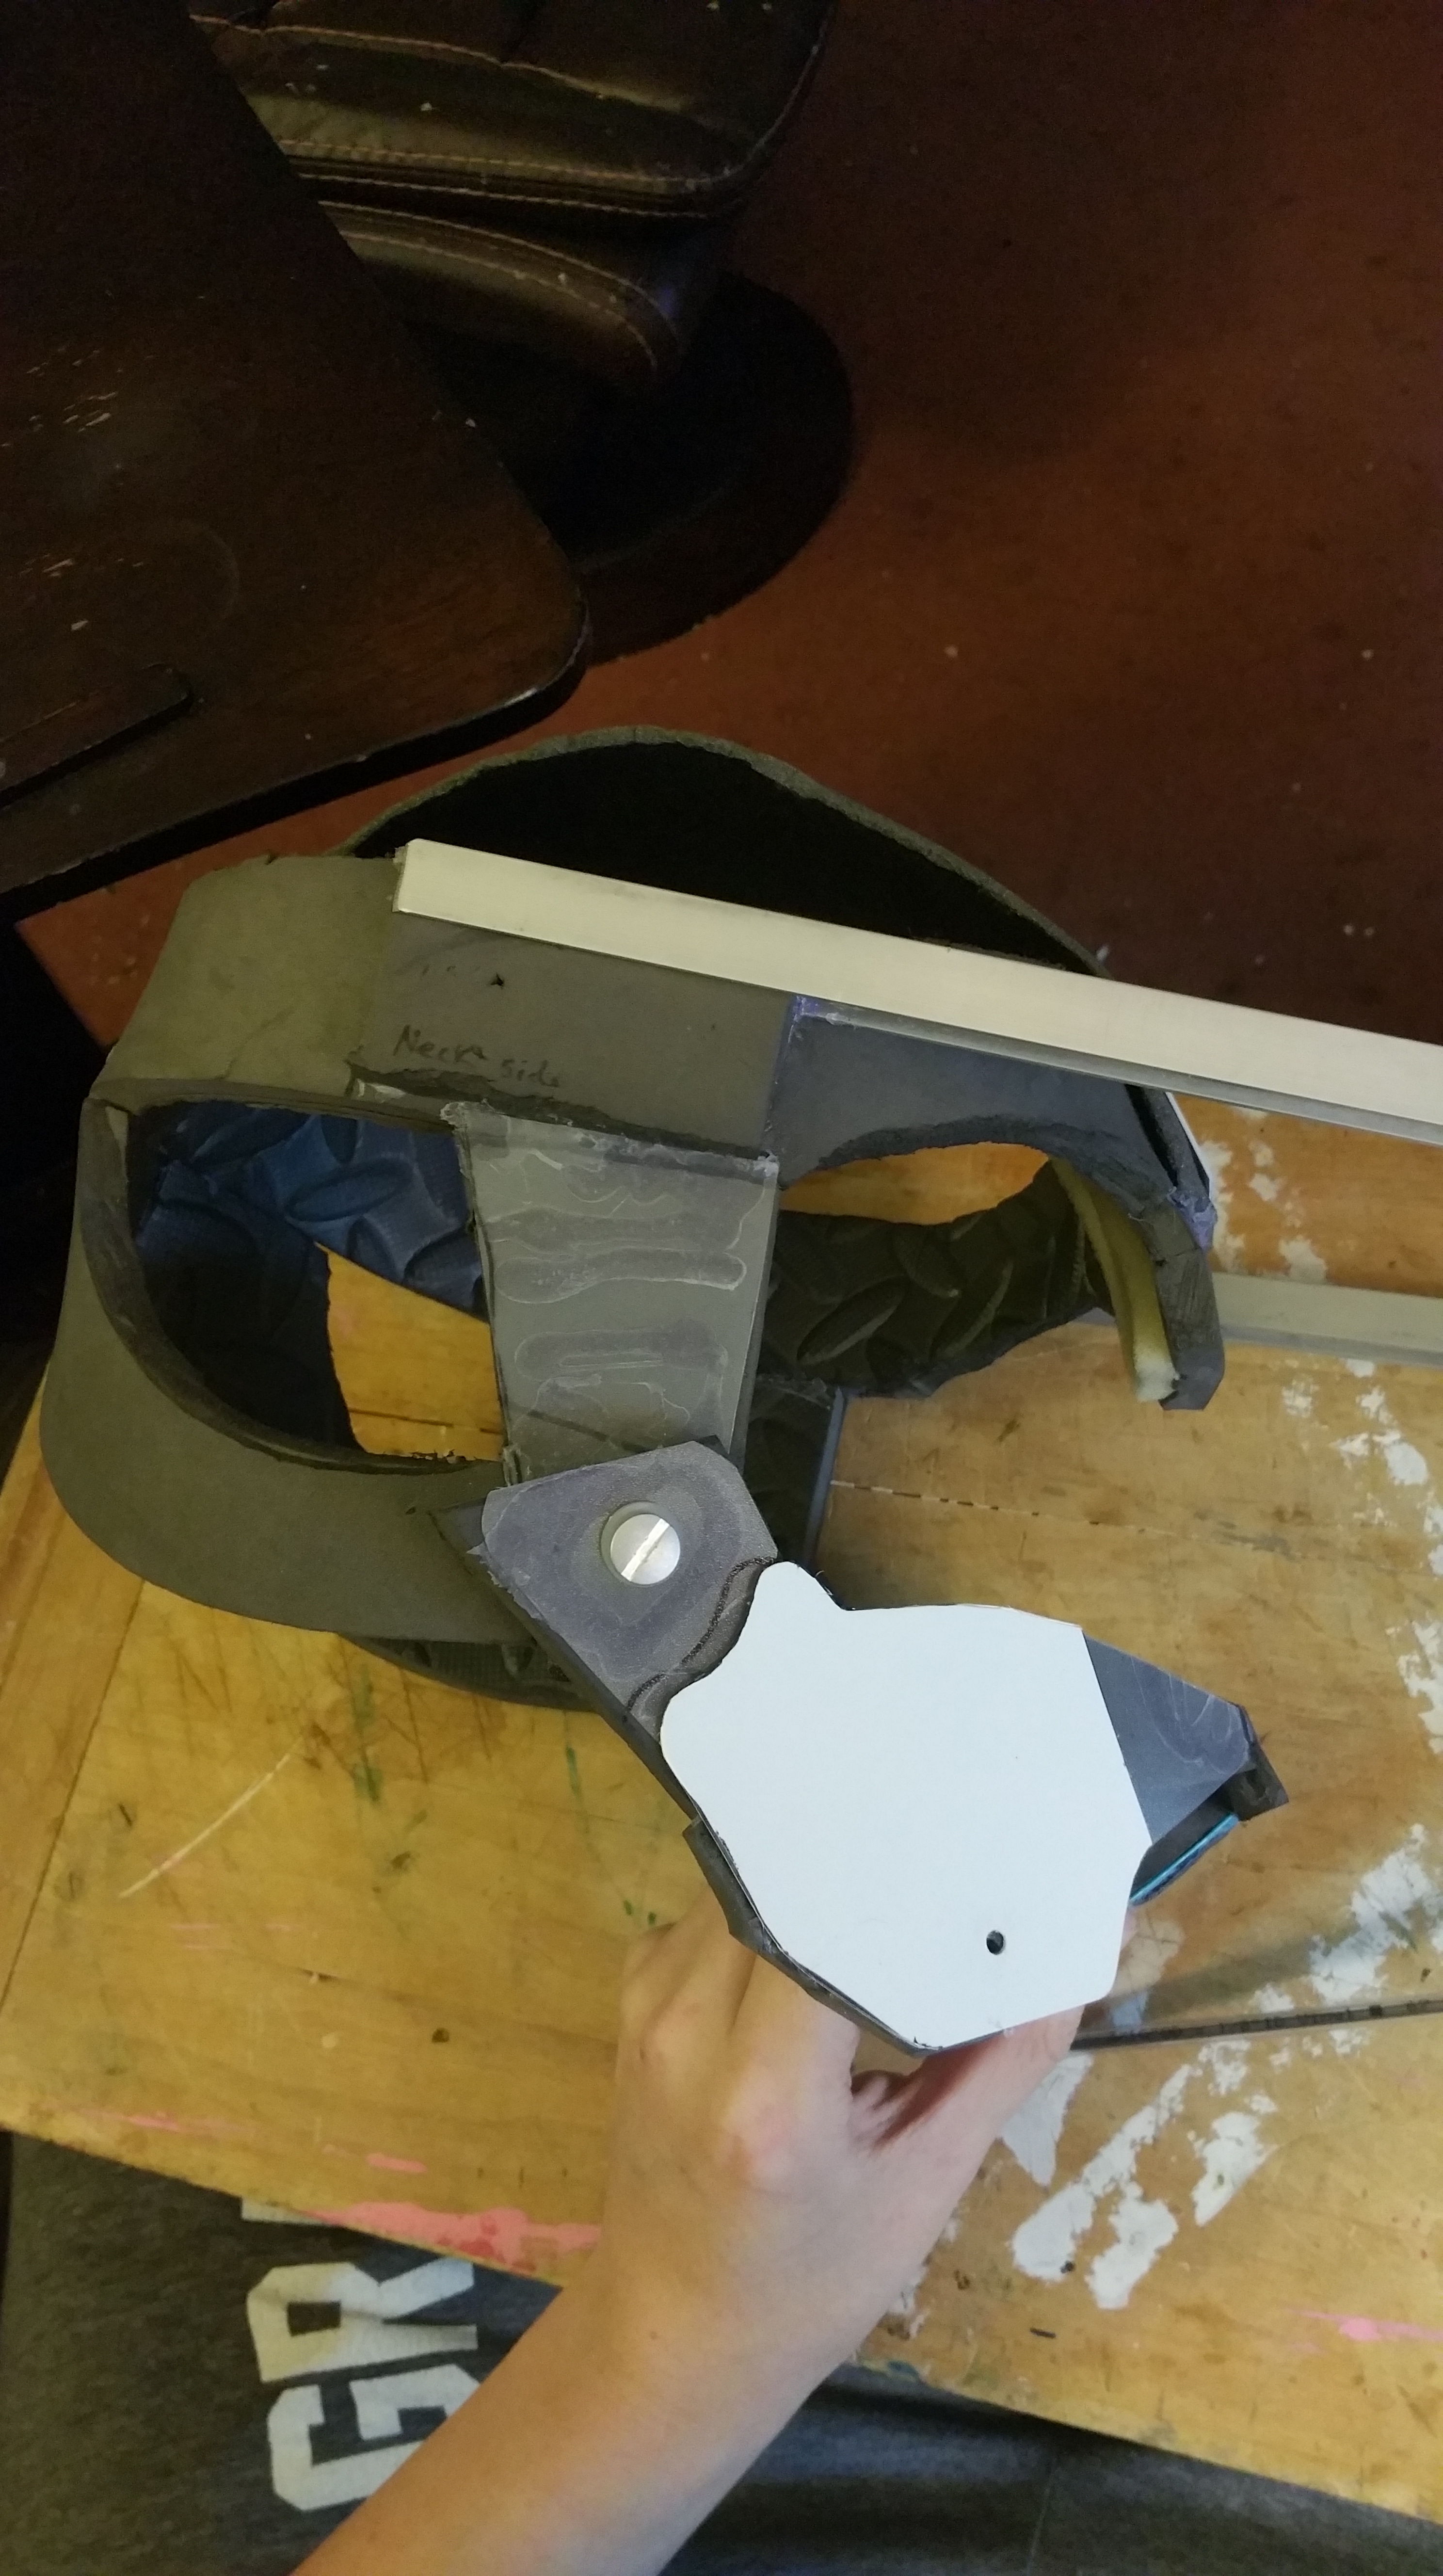
The last important piece is the metal triangle set just above my forehead. These two metal pieces meet at the end, are zip-tied together, and both glued and zip-tied to a piece of PVC board, which is bolted (with a slightly longer than necessary screw post for more free movement) at the top end of Vandal’s muzzle. It can move up and down and left and right, and because of it’s specific placement at the end of the muzzle, it helps the head actually rotate on the hinge at the back of the head. It’s a little hard to explain without going into a bunch of mechanical jargon, so I’m just going to leave it at that, but I may make a technical video in the future to better illustrate some of the stuff going on inside this suit.


And finally, here’s a video that showcases the movement of this piece in it’s completion! (I also go over a few main points of the build for newcomers to the project via YouTube).
If you’re wondering about placing foam and fur over this skeleton and still having it move, I will be leaving a seam around the head and neck with sections of fur that will overlap and slide smoothly over each other to maintain the movement this has. Obviously covering this with a single piece of foam and/or fur would hinder the movement almost completely, and since I’m not using the strength of servos to move the head and am not using stretching NFT fur, I have to compromise by having this seam. I’ll do my best to make it as hidden as possible. I imagine it won’t be too difficult as his ears and cheek tufts cover up a lot of where the seam would be, but we’ll see when I get there. Until then, enjoy this video and I hope you like the results so far!
And with that, I think that just about covers all these pieces. If you have any additional questions, feel free to comment below.
