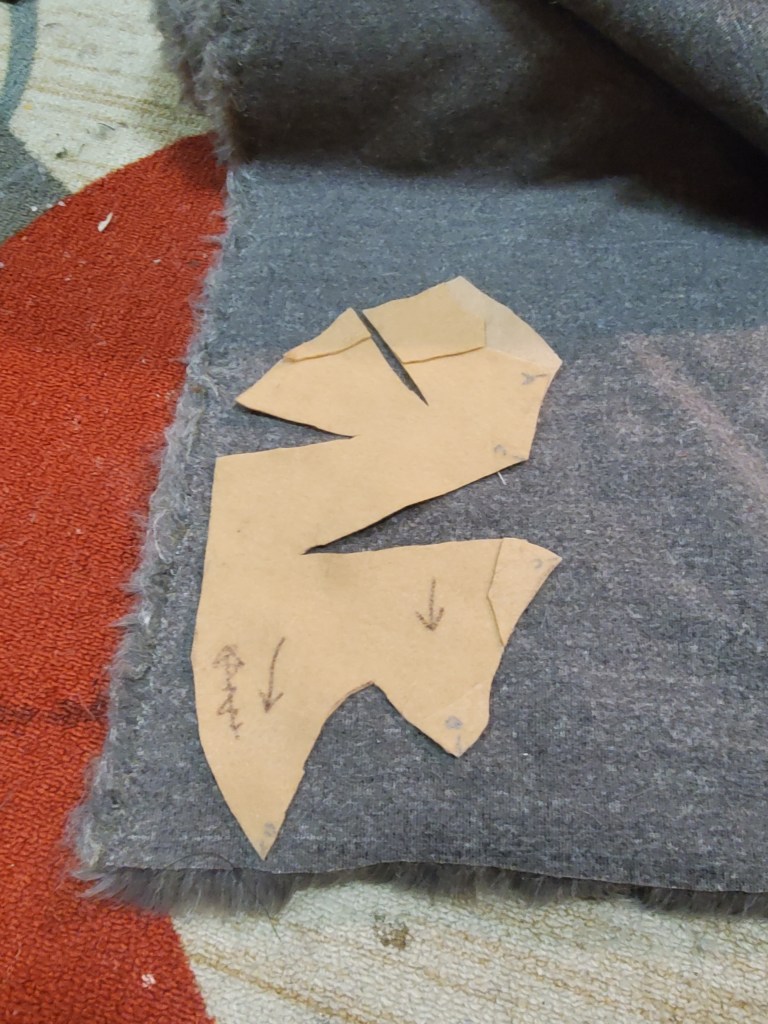
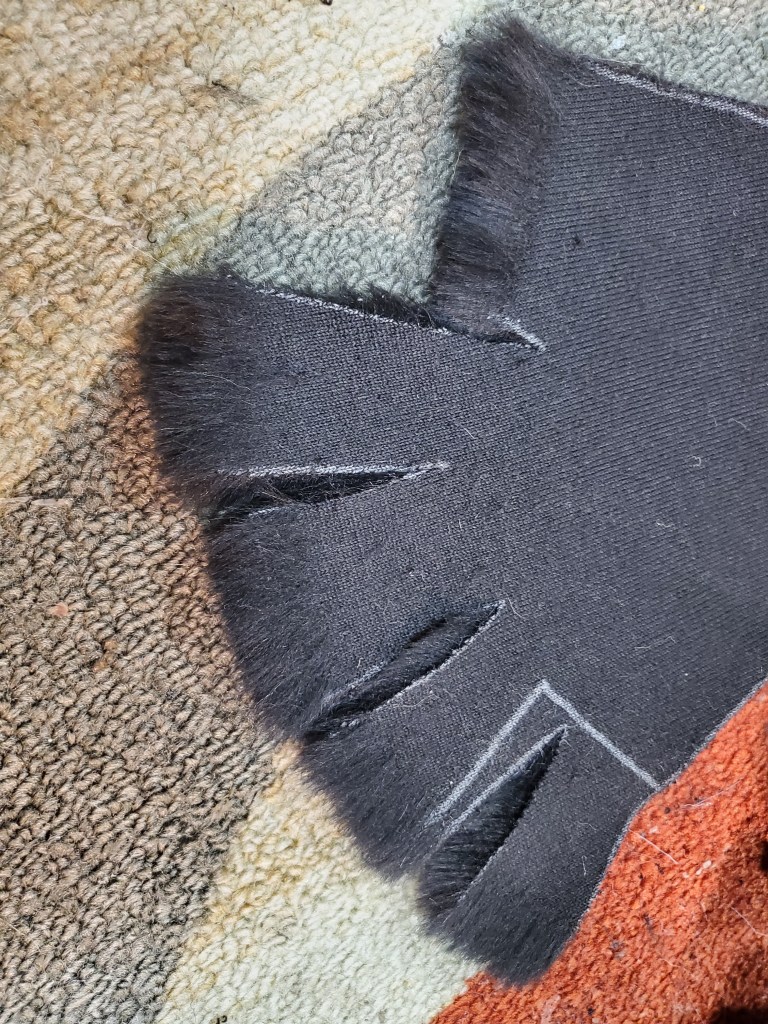
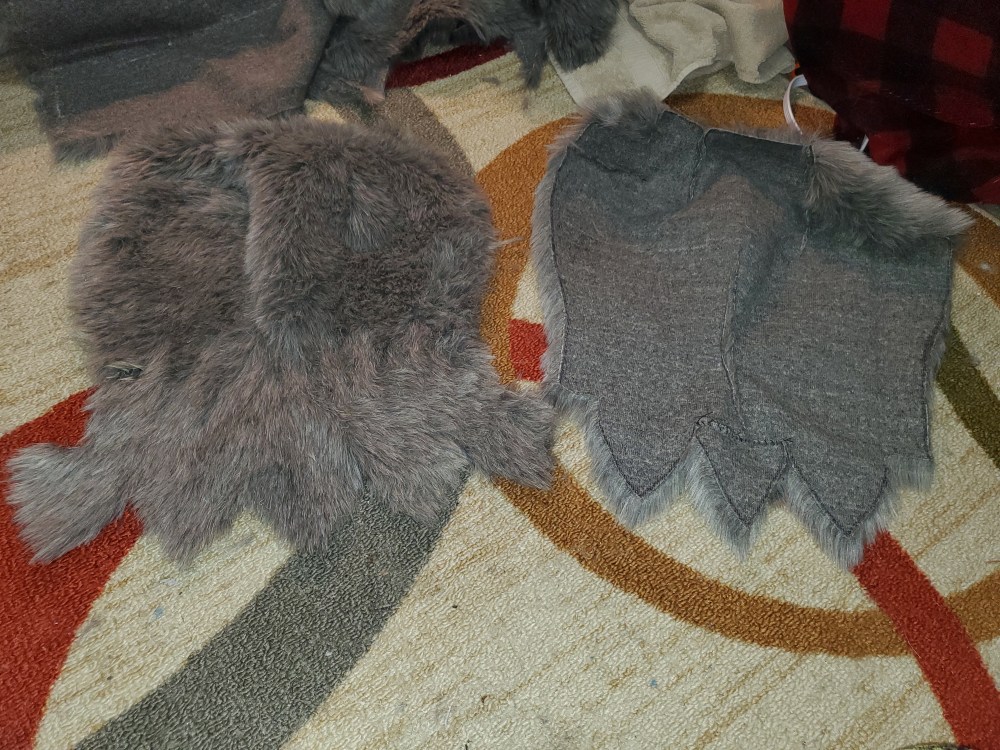
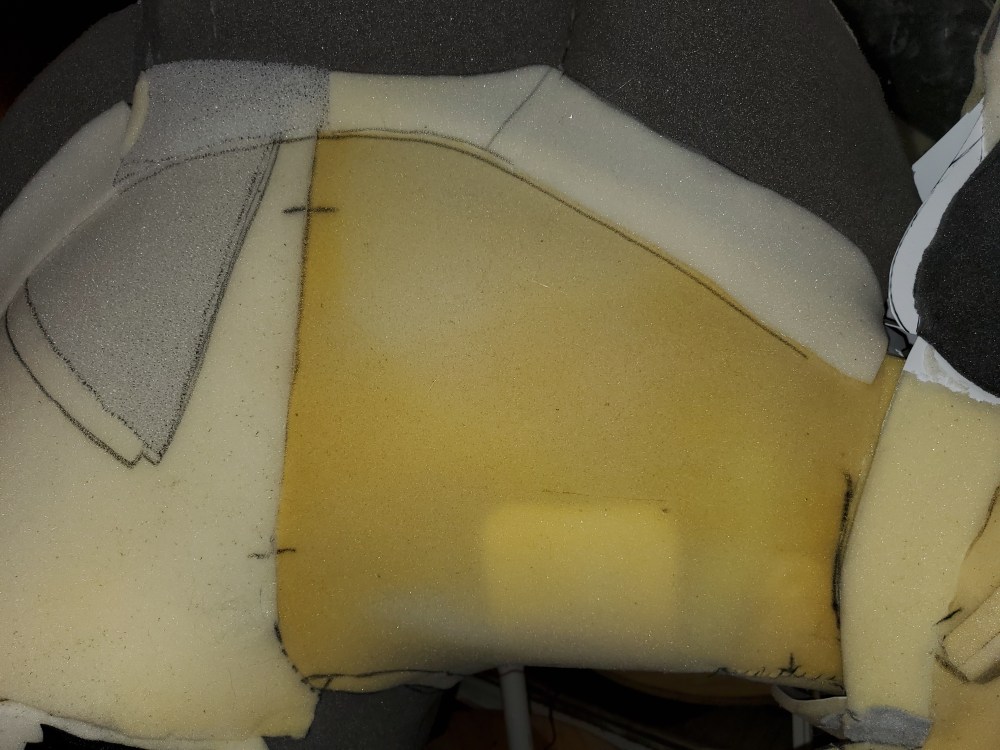
The way I pattern costumes for adding fur or skin is quite different than most use (which is the duct tape method). I use felt to make a sort of cover for whatever piece I’m working on, cut as needed (for darts) and then trace that pattern onto the fur backing. This may make more sense with pictures:
I use arrows to remember the direction of the nap required for the piece, and often I will mark points with A, B, C, etc, so when I’m sewing I know where to attach and match up each piece.
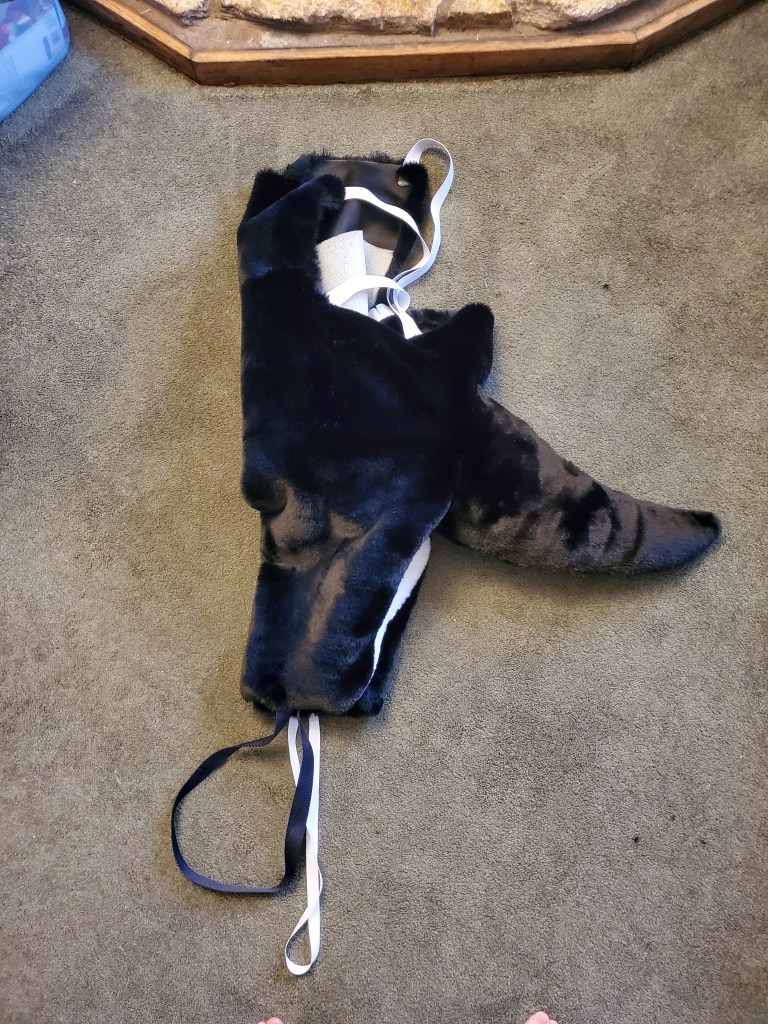
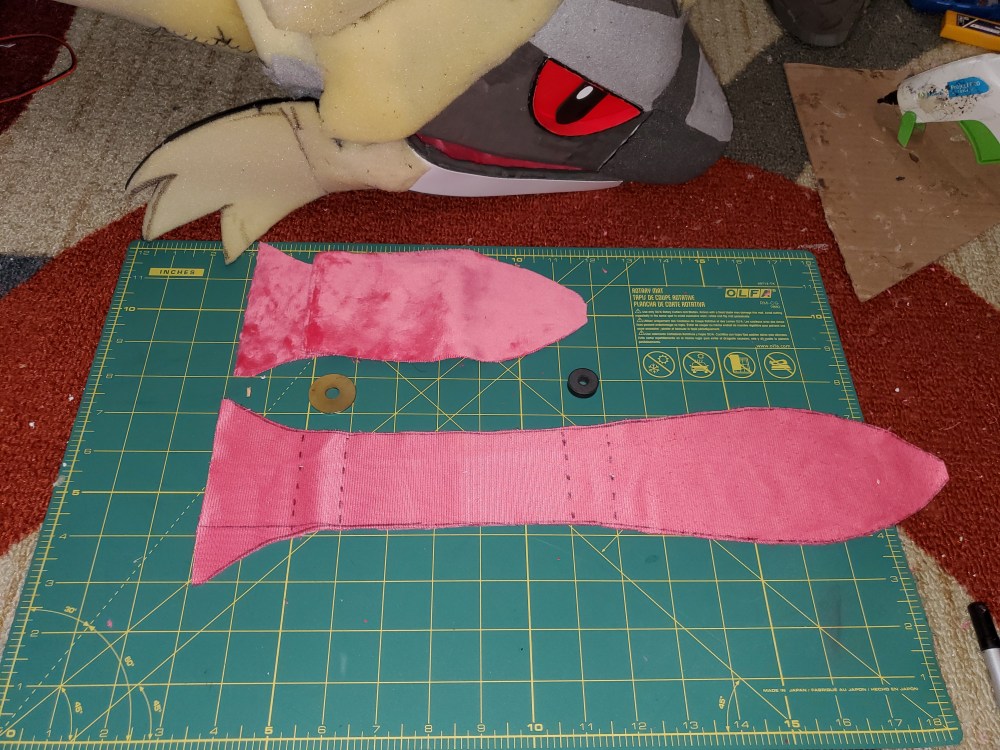
I used this method for the entirety of the costume except for the bodysuit, which I was able to just take measurements of myself (since there is no real major padding except a tiny bit in the crotch) and sew together as would be the process of a normal, unpadded bodysuit, seen below:
The elastic in the back and over the shoulders is just to help hold the suit on, as I didn’t want the entire back to be covered in fur when the vest is already going over it, for cooling reasons. The straps at the bottom act as stirrups to keep the legs down inside of the “boots” when I put them on. The tail is sewn directly onto the bodysuit, as no real partial-use can exist for this costume.
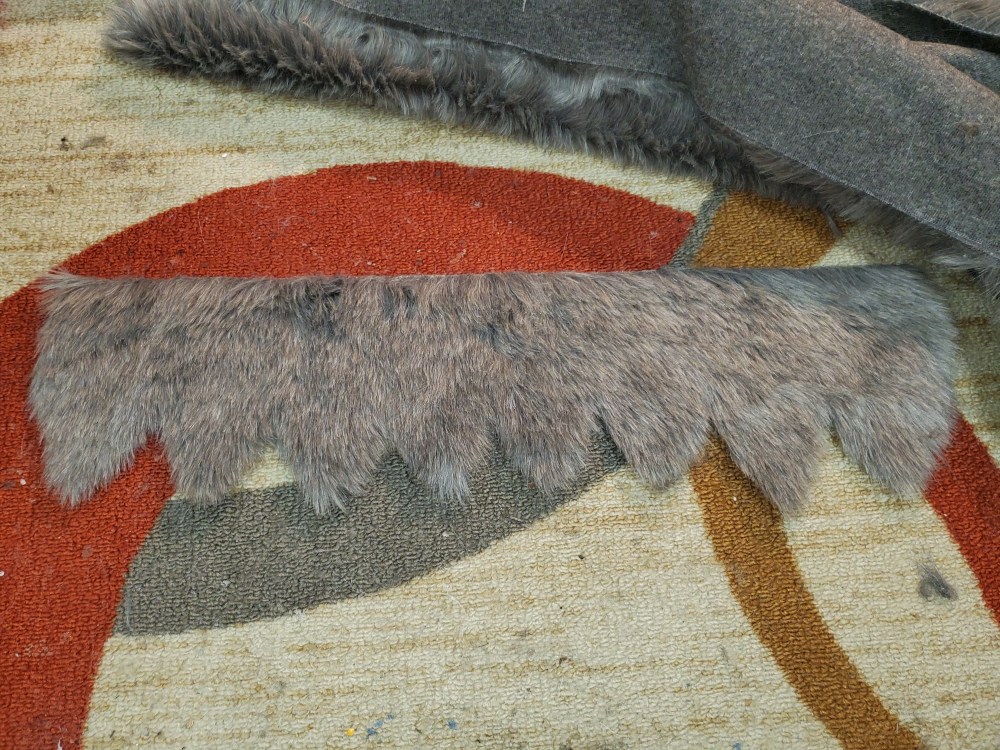
Once all was patterned, traced, and cut out, it was time to sew! (Just sharing the vest and neck here to save some space; all pieces were hand sewn with machine reinforcement in some places).
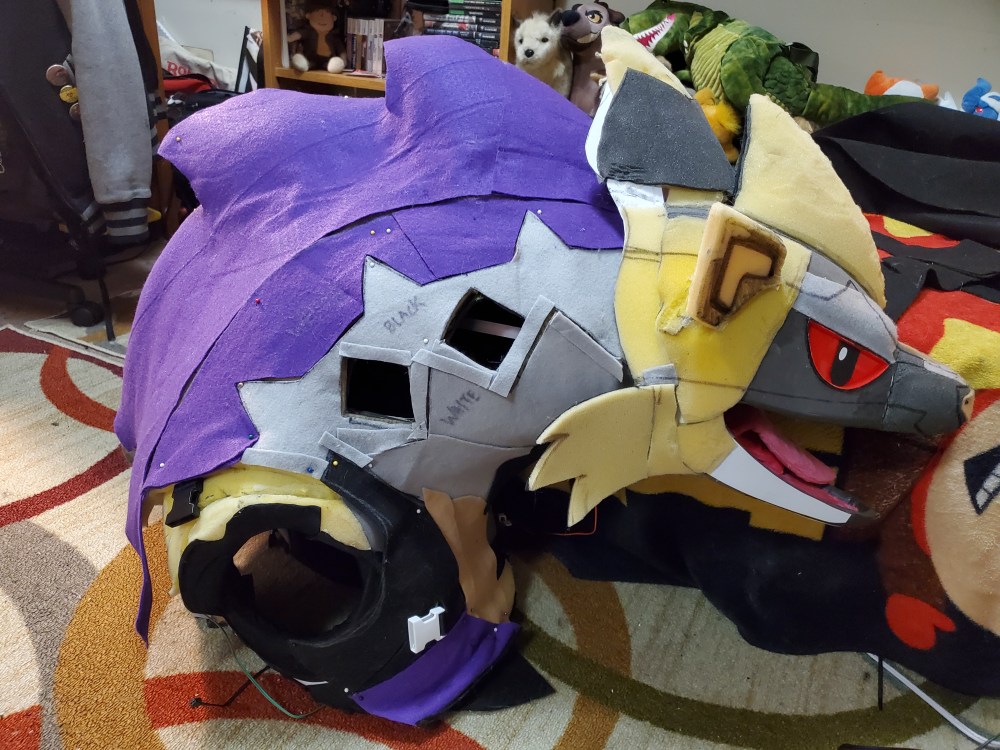
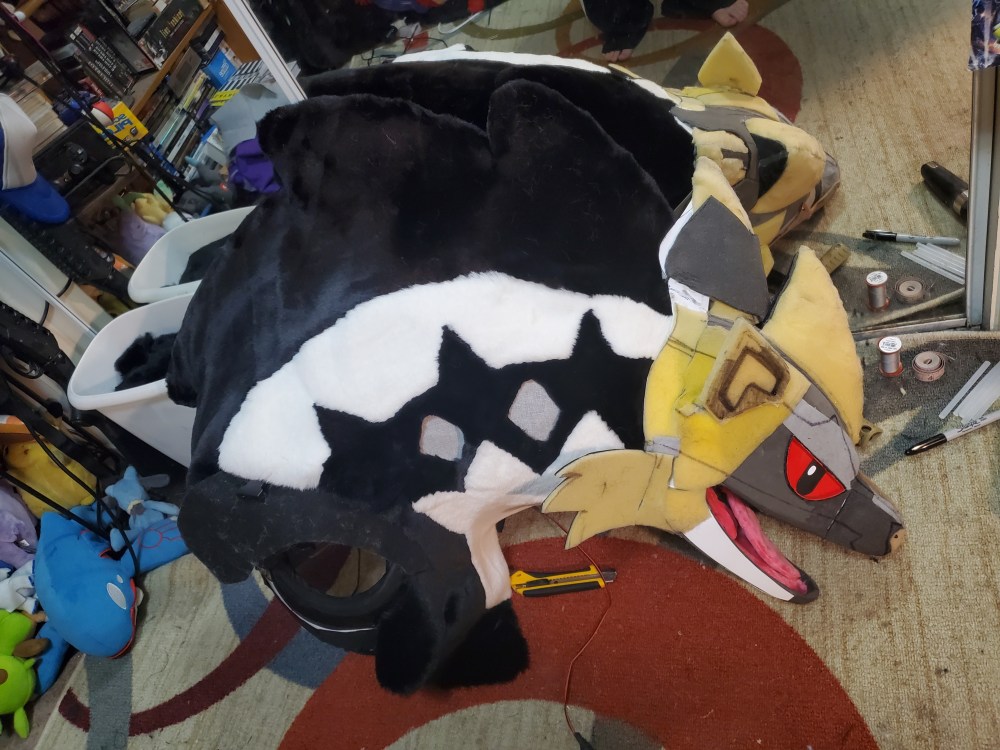
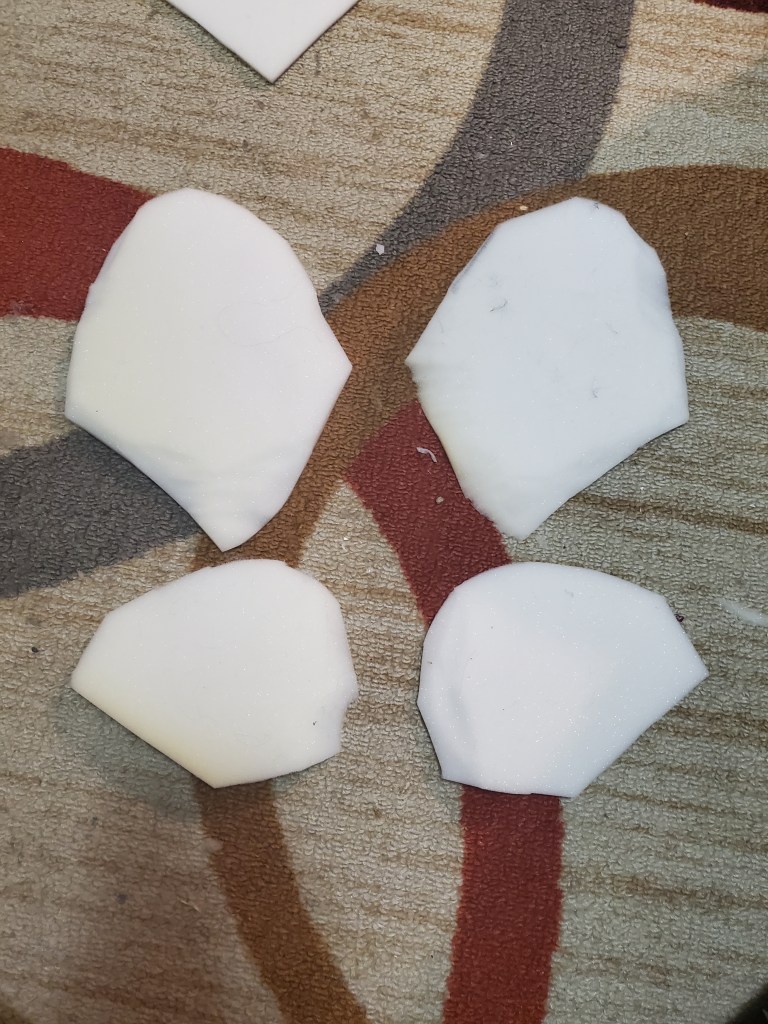
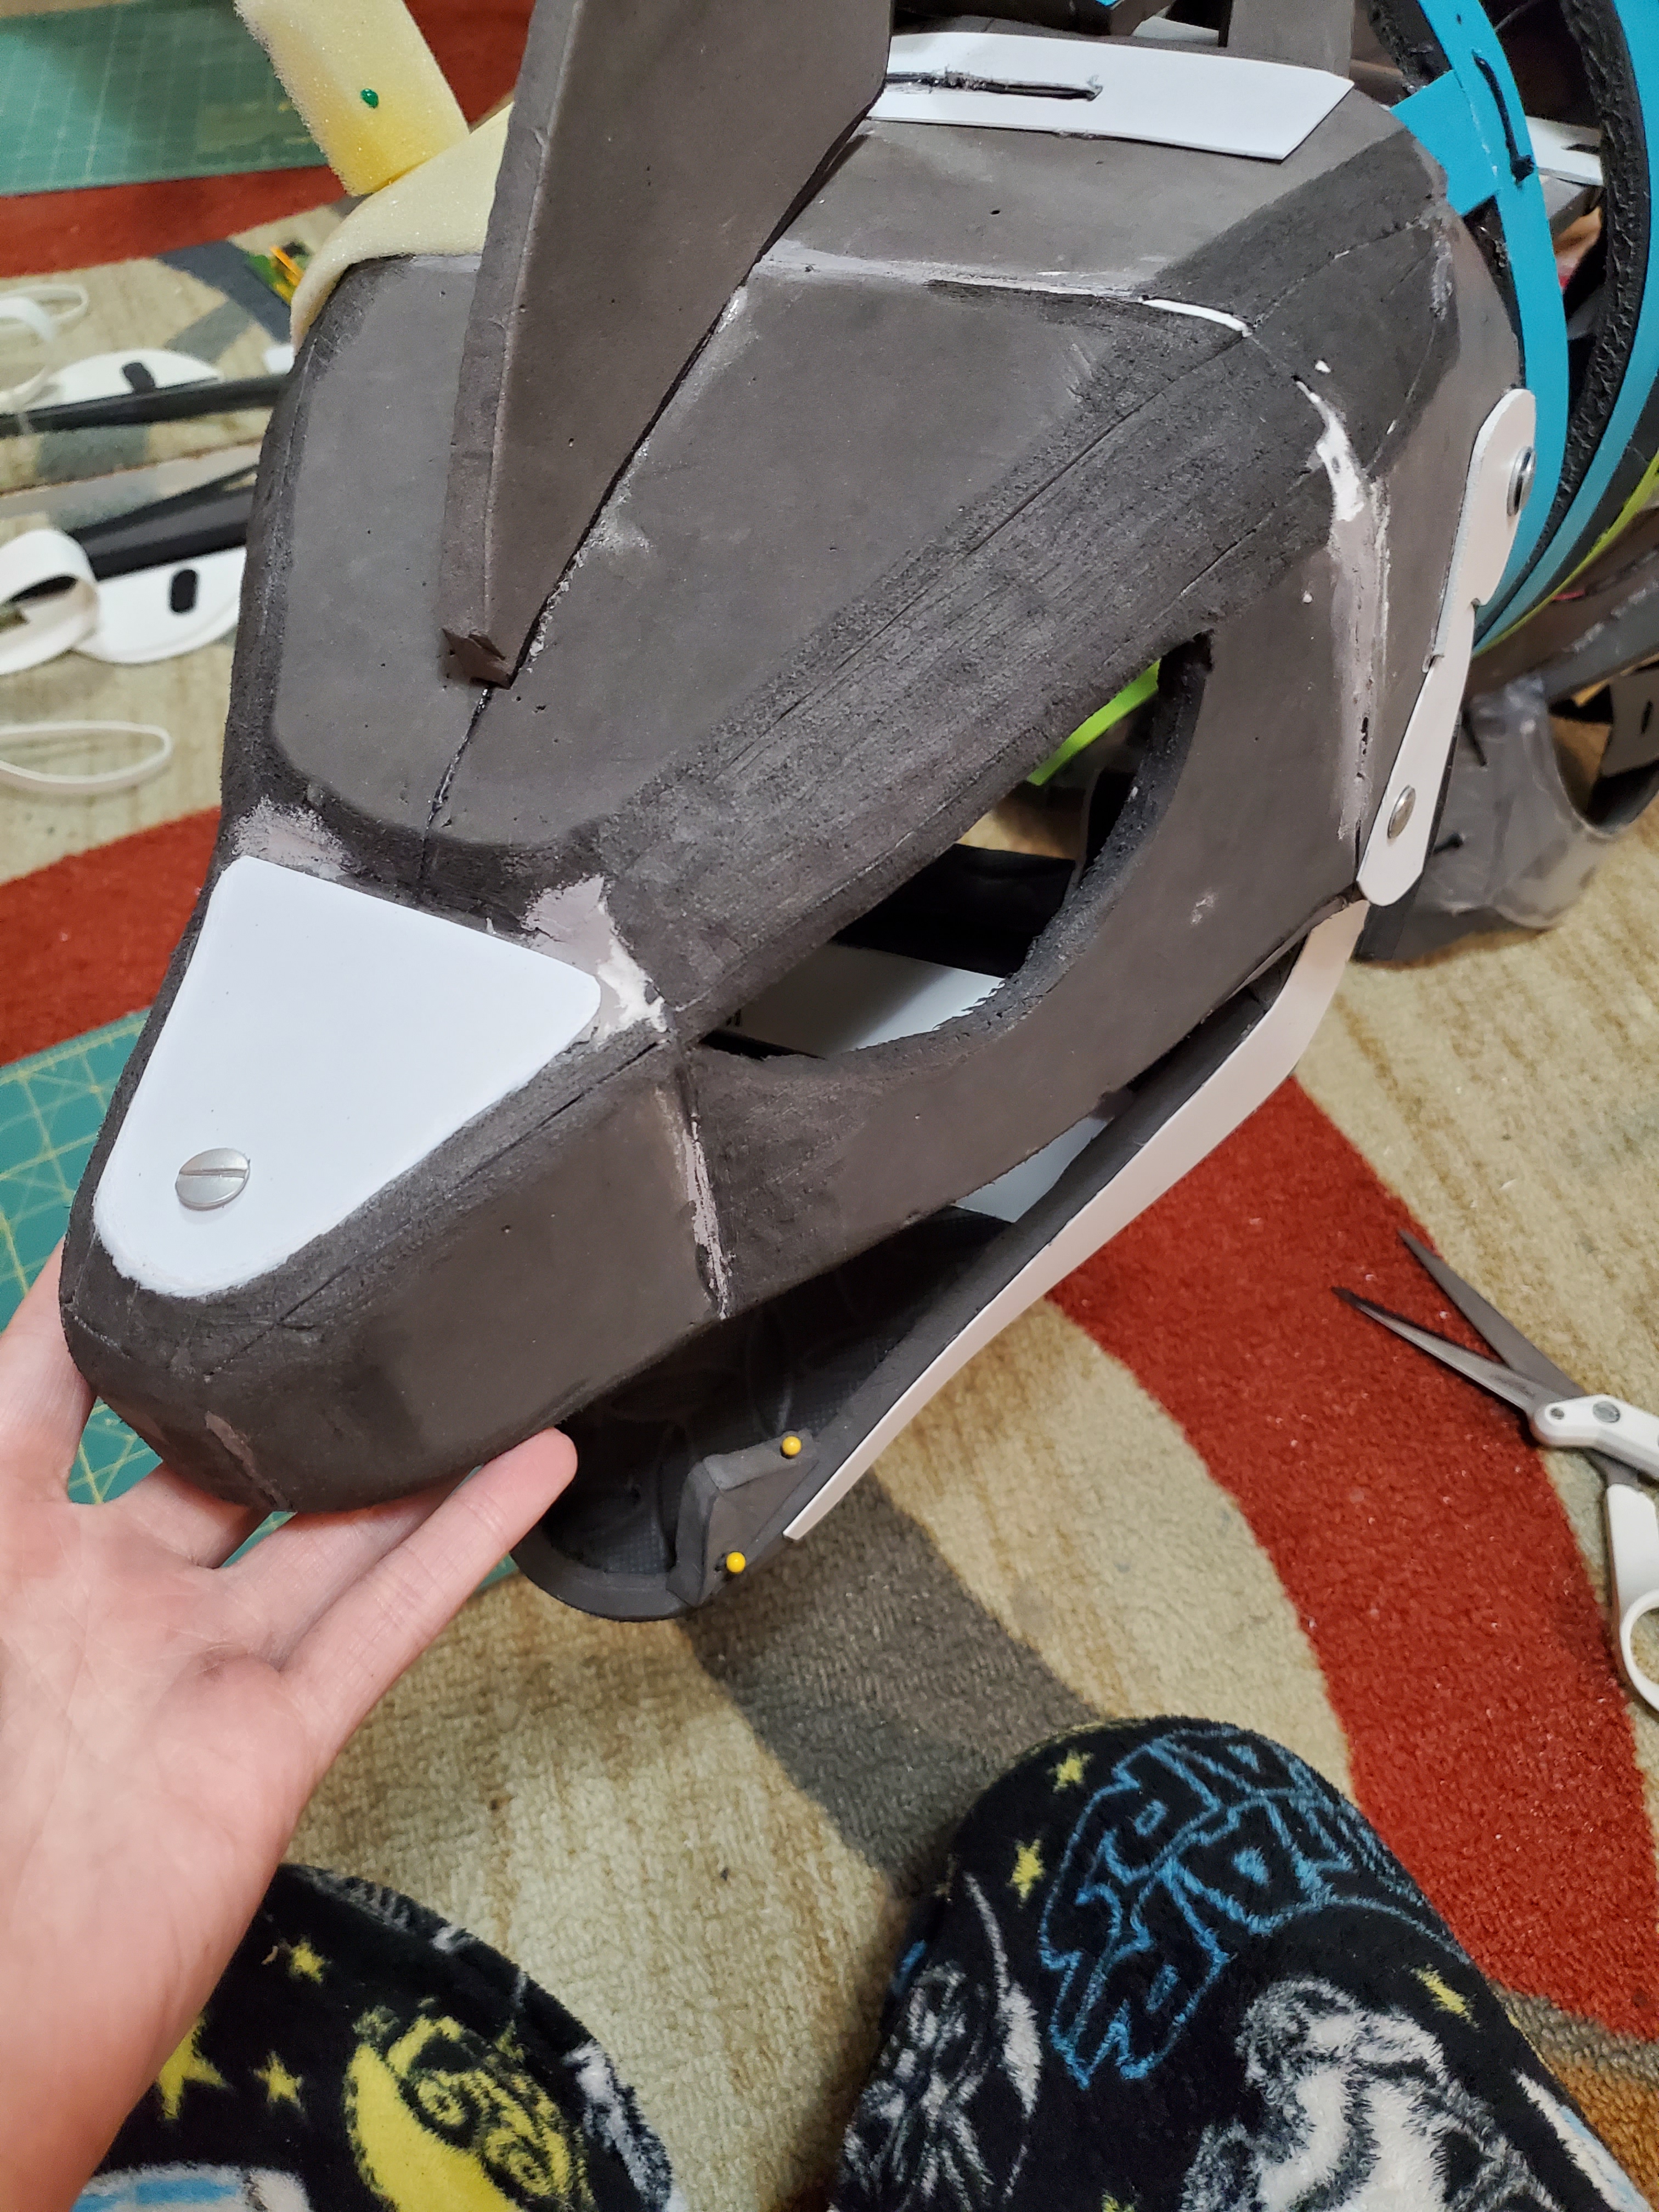
Now, before I place the fur onto the neck, I need to cover the diamond openings with white buckram, so I slapped a piece of it on there (after painting the back black for glare reduction; I painted the backing black first and then repainted the front white because there was bleed due to the openings).
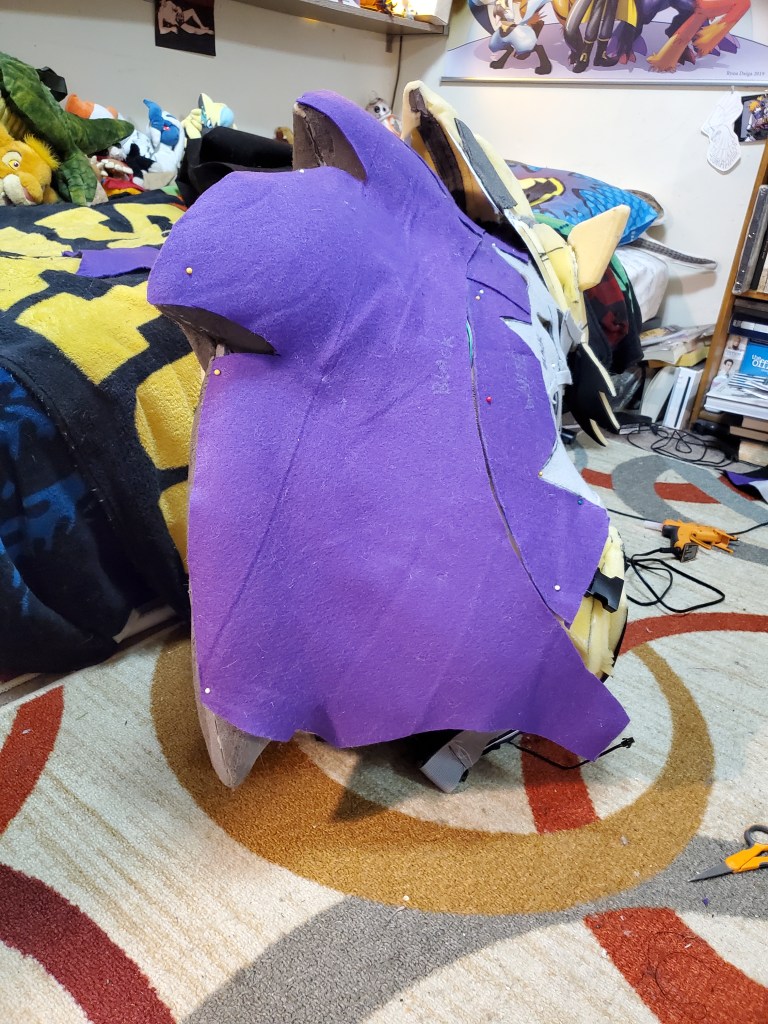
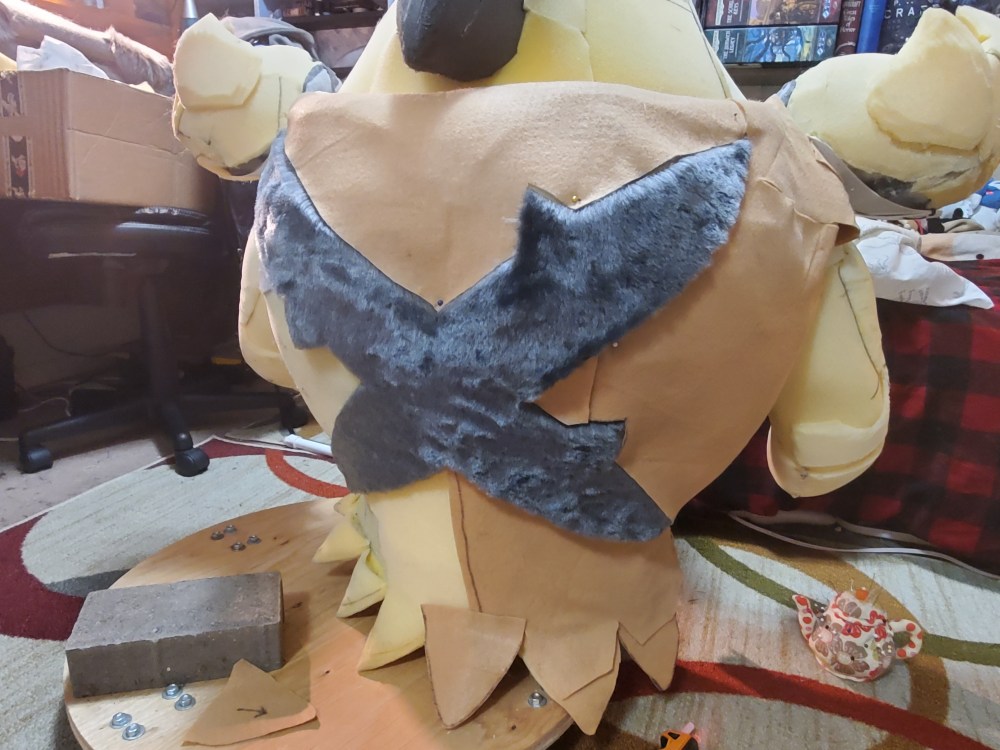
Here are some WIPs of me applying the fur skins to the neck and head!
I should also mention here that that seam between the black mane and white part of the neck does contain a zipper for accessing inside the neck (invisible zipper!). The nose will come later as a piece of EVA foam stuck to the front. For now, it’s time to start securing the fur to the foam in key places and refining some bits like around the mouth, etc. After that’s complete, I can add the teeth, which will be cut pieces of styrene, and add the scars around his left eye.
Deadline
I will say, at this point I reached the end of my deadline, and was forced to work on some of the final touches such as sewing some things down and adding the teeth/scars at the hotel room for our convention (SacAnime), so I don’t have pictures of these as I was quite rushed and didn’t think about it. So for the next post, I will be adding post-completion pictures, as well as sharing my con photos, where I’m considering his debut a test run due to him still requiring some tweaks (but it went very well!). So stay tuned for the final log post for this project! I will also be making an overview video of the suit for a more in-depth look at all the pieces.
As always, feel free to leave me question or comments!
The way I pattern costumes for adding fur or skin is quite different than most use (which is the duct tape method). I use felt to make a sort of cover for whatever piece I’m working on, cut as needed (for darts) and then trace that pattern onto the fur backing. This may make more sense with pictures:
Note: I actually swapped between working on the feet and hands (the last post), and the vest, but for the sake of having an organized log, I’m writing these next two posts as if I just worked on them straight through to finish, when in reality, I got a little done on the hands, swapped to the vest for a while, then swapped to the feet, then back to the hands, etc. I just preferred these logs to be more of a work summary than an actual daily or weekly work log, which would get really tedious.
So far I’ve gotten a lot done on this suit, but there’s still a lot more to go! This post is going to go over how I made the grey body vest and the bulky upper arms. I’m going to mix this post up a bit by adding a video to it to go over things instead of writing it all out, because at the moment I’m rather short on time and a little behind at logging stuff (as well as having forgotten to take some WIP of some things…) So a video works a bit better in this case 🙂
The Vest
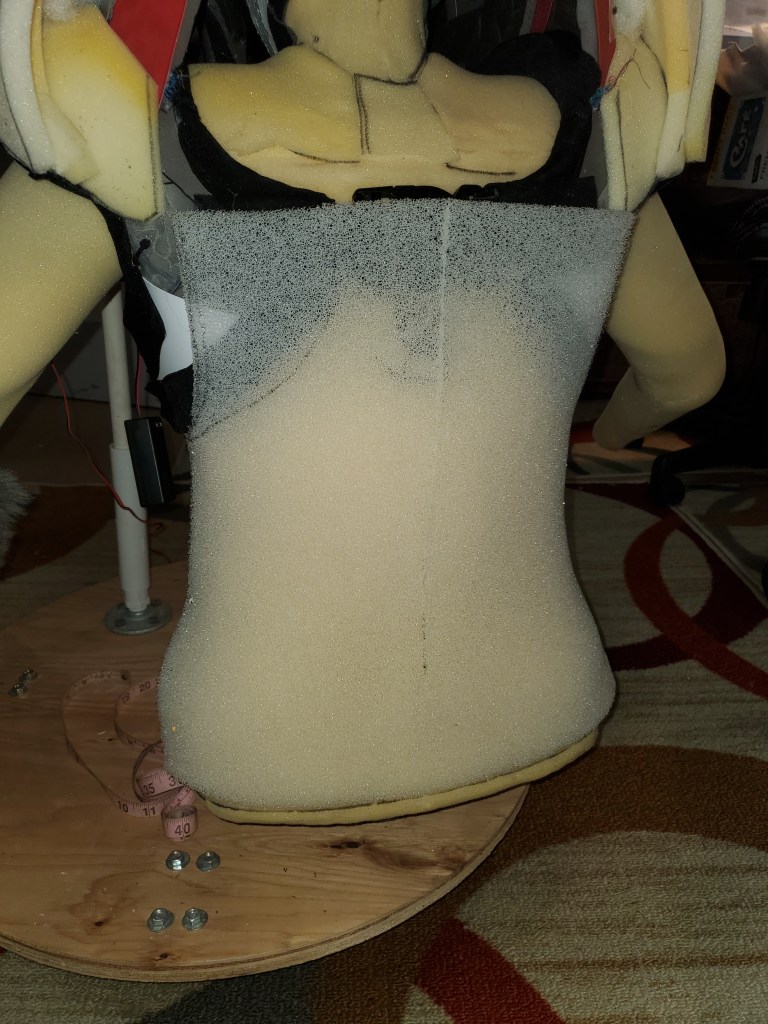
I knew the vest would be the biggest undertaking other than the head. I mean, the thing is huge. Initially I thought of having it be solid foam, and placing cooling packs in it, but as I thought about it more, I came up with a different idea. I ended up making significantly less pockets for cooling packs because I’m not sure they’ll be entirely necessary anymore. I ended up using more reticulated foam and a hollow cage for the vest structure. Here’s some progression photos of building out the vest:
The last three pics are of parachute clips added to the chest of the head and the other side in front of the shoulders to connect to it. This keeps the vest together in front.
I had to work on the vest with the head on the mannequin, and discovered later it would actually work better if I cut down the shoulders down on the head and made a channel for the vest to sit down into, so I did that and added a parachute clip to each side to help hold the vest on (especially after I add the puffy things on his shoulders which will weigh the shoulders down a bit), where the other end of the parachute clip is inside the vest.
Once I had the base done, I went ahead and made a liner for it out of spandex (which I don’t have WIPs of), making sure not to glue the edges since I haven’t added the fur yet and I want to sew it in.
But anyway, back to the vest. Now I started constructing the puffy spiky things on his shoulder. The interior is EVA foam for a sturdy structure, with ribbing to keep them rounded instead of just using Poly-Fil, and then there’s a layer of thin foam over them. The spikes are plain foam carved into shape.
These things are where I wired up and placed the two speakers, with reticulated foam in front of them to unobstruct sound, but I do have a major change I will discuss coming up regarding that.
At this point, I started constructing the upper arms, which I also for some reason don’t have WIPs of even though I swear I remember taking them. They may have been on my old phone and didn’t transfer over…But anyway, I have the buildup of the upper arms and the muscle I used to help build it out, and I can at least mention the layering I did. The first layer was reticulated foam, to help with sweat and cooling. Over that I placed a layer of 1/2″ normal foam, and a piece of 1/4″ foam near the elbow (where I also folded the liner over), and then began constructing muscles over that to help build out his shoulders and make him wider. Note: The majority of the foam is on the outside of my arm only, for the sake of movement and comfort. This makes him appear wider without compromising too much movability or making it so I can’t put my arms down.
After I constructed the arms, they made the vest sit differently on the mannequin and the front no longer fit together very well, so I’m going to have to add more to the front of the vest to get it to look right again. This is actually good though, because it helps make him look even wider, and gives better proportions for the best, more accurate to the original design.
I attached the shoulder spikes to the shoulders by first gluing them on, then placing a Styrene brace attached to the shoulder EVA and running out to the end of the spikes to keep them from sagging down.
From here, I noticed that I could actually bring the area under the arms out a little more than just the foam did, so I added some Poly-Fil to that area to help make him even wider and, again, make the proportions a little more accurate.
You can also see that at this stage I started adding a little more to the front of the vest to help bring it out more and to have it nearly touching in front which is what it’s supposed to do.
From here, I’m going to direct you to a video I’ve done going over a few other major aspects of this build, including the electronics, and some other changes I’ve made, especially ones straying from my original plans. Enjoy!
The end cut off a bit thanks to my accidentally pressing stop on my phone but hopefully that video was helpful!
All in all, here’s a video of all the current pieces working together, ready to be furred!
Quick WIP video of Vandal the #Obstagoon with the foam work /nearly/ done and SFX installed! I've already started patterning his head and neck (the felt along the side) as well as his hands and feet. Boi will be done SOON. #rarsuit#cosplay#Pokemonpic.twitter.com/LMAzWdF682
— McKinley Massacre//Team Skull Rayne (@McK_Massacre) December 31, 2022
Next post will be about me patterning each piece in preparation for furring, as well as working on the pants, stay tuned!
The way I pattern costumes for adding fur or skin is quite different than most use (which is the duct tape method). I use felt to make a sort of cover for whatever piece I’m working on, cut as needed (for darts) and then trace that pattern onto the fur backing. This may make more sense with pictures:
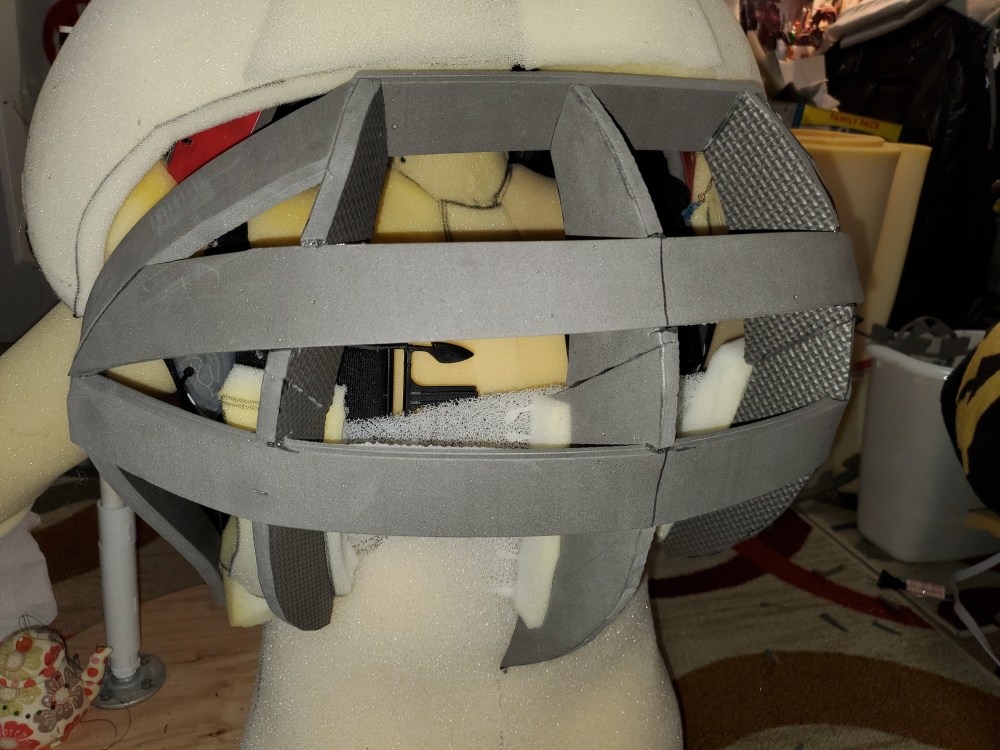
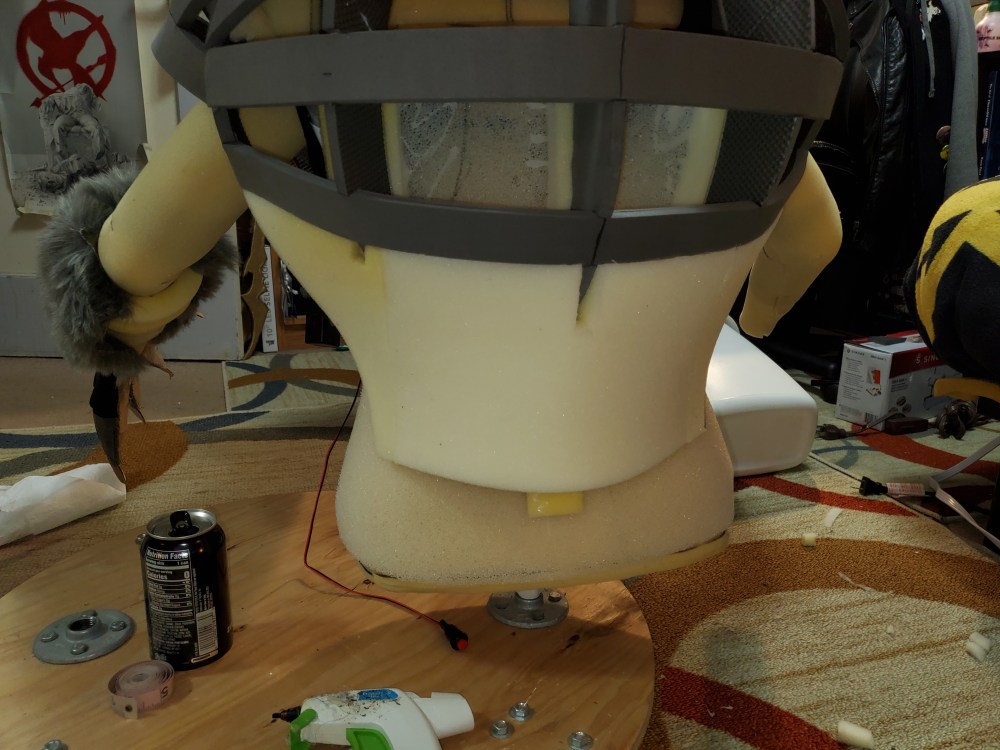
I’ve finally made it to an exciting stage: foaming the skeleton! This process took me about 2 weeks of full days work, and I made a few more changes to the skeleton as well.
I started with his head, which required a lot of foam around the back to make it less square and blocky looking. I also started building it up toward the first hair spike. Looking at the 3D models from the Sword and Shield games, its apparent that his head is very smoothly arched up into the hair spikes, whereas my skeleton has a flat top. This is fine since the skeleton was just a base and I anticipated needing to add a lot of foam to it to achieve an accurate shape. I try to keep the skeletons minimal.
Note: I also played around with his ear placement at this point, so one side has an ear pinned on!
The foam was layered, with the upper layer (the grey foam) being sand-able for smoothing around the eyebrow. I also added a layer of thin 1/4″ foam on the side of his head to bring it out slightly, and shore up the area around the hinge where his lower jaw was slightly inset. I also added a layer of headliner around his nose to round it out some and smooth it, as well as the bridge of his nose. The grey felt is there for extra smoothing, and in the case of his nose, to cover the bolt attaching the inner head rods. You can ignore the yellow foam on his neck in the middle picture, this was just for testing smoothness and not official yet 🙂
Now, the first thing that happened in terms of changes was an extra reinforcement I felt the need to add, after noticing that the area was sagging a bit as I was foaming his head. The area in question was the topmost sliding area of the head (where his spine attaches to the back of his head). While the area itself, as well as each side, was reinforced with plastic, or in the case of the hinge itself, a thick piece of PVC, the EVA foam between these areas was not reinforced, and a crease was beginning to show. I took a piece of styrene and covered the entire area, locking it in place with both glue and zip ties. Below are before and after pictures (I had to remove the third hair spike to do this):
This area now still flexes slightly which is great, and the bolt still slides underneath the styrene, so all is now well with the sagging hinge!
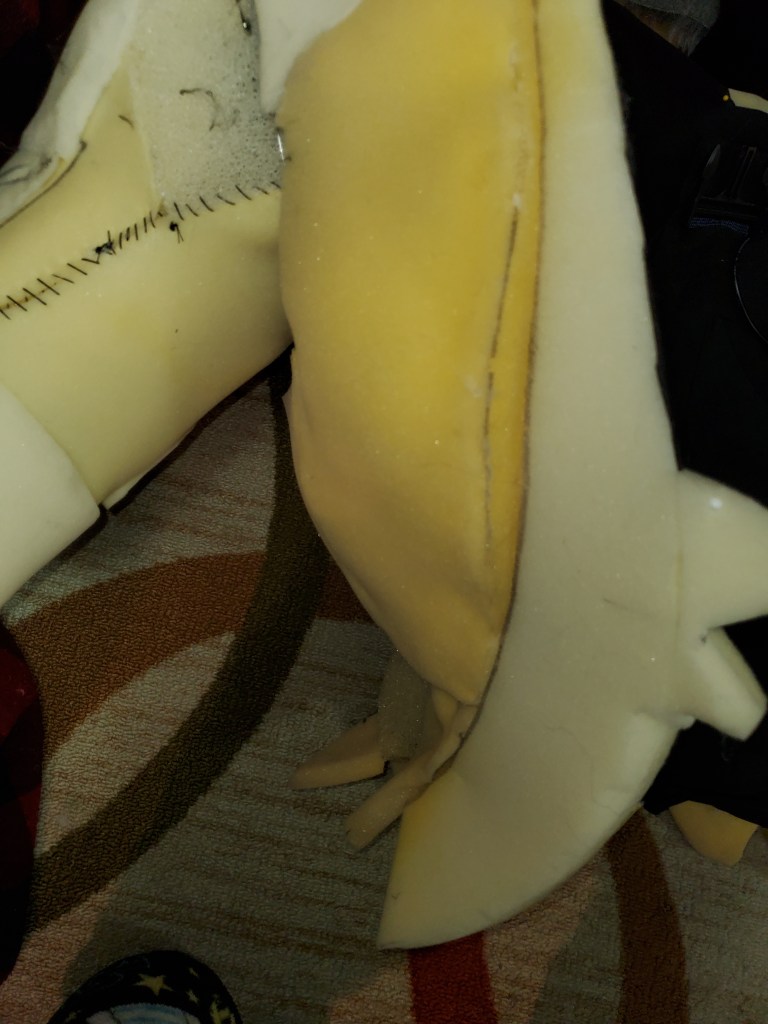
Next, I started fleshing out the hair spikes (#1 and #2 only so far, with the others only being center bases), and began filling out his shoulders with thick foam. I also had to shore up the area just after his shoulders because the skeleton curved inward pretty drastically, so I layered a couple pieces of foam into that area to bring it out slightly (the last two pictures show these pieces).
After this, I initially added some pieces of foam from my scrap bin to continue fleshing out the neck, but later decided I didn’t like this setup, for a couple of reasons: one, it was just messy looking, and that also leads into the second reason, which is that I will be adding a zipper into the seam between his hair and the sides of his neck on both sides so I can peel the foam back to do interior work if necessary, so this area will potentially be seen or felt and I decided I’d like to put it together nicer than that. So what I did was use the dark grey foam that is sand-able (it’s not EVA but its similar) and layered them sort of like muscles, sanding down the edges so they will look smoother when the neck is complete.
The first picture below shows what I had prior to the layered grey foam.
You’ll probably also notice the weird looking patch of foam on the shoulders, it almost looks like a patch of buckram. This is reticulated foam and acts as a vent! Or will hopefully, it really depend on how well the fur I’m using ends up breathing. But hopefully it will help with heat dispersion.
I also put down a layer of the grey foam on the chest so the neck tapers a little better into that area and isn’t as abrupt looking at the edges.
I’ll also add real quick what I did to help the cheek fluff/spiky things stand out in the right way, and make them sort of reinforced but still flexible. Instead of just being made of foam (and thin foam at that, 1/4″), I lined the back with a layer of thin EVA foam, and then added two strips of the same EVA to the back of that in a curved arrangement, so the help make the spikes stick out instead of going in toward the neck.
That also reminds me to mention, since you can see it in the above picture, I slightly modified the jaw wiring to be attached in the center of the jaw rather than on either side of the jaw. This alteration was done after I noticed that the wires being on each side of the jaw were actually impacting the movement of the head from side to side, as they would begin rubbing up against the inside of the first neck rib and impede further movement. By moving the wires into a ^ shape, similar to the rods in the head, they no longer come close to either side of the inside of the ribs.
As a small alteration note related to the above, I also added two loops of elastic that hang from the top of the neck, attached by two zip ties that slide along the plastic bar near the end of the neck (the one that also helps to reinforce the neck sides). Through those loops, the metal bars going from the sides of my head to the inside area of Vandal’s head (attached at the nose, if you recall) and help a lot with relaxation and jaw movement. While not impacting the movement itself, these elastic loops allow me to open the jaw by tilting my head down instead of needing to open my mouth. I must open my jaw, however, when his head is up, since the loops then no longer support the rods. This option though allows me to walk around with his mouth open so I can see forward without needing to have my own mouth open at all times. Obviously this is much preferable! It also helps open the mouth a little more than I can naturally open it with my own jaw, when I open the mouth all the way and tilt my head down, his jaw opens quite wide!
From here, I continued to flesh out the hair spikes one by one, smoothing them over with a layer of thin foam over the top of the chunks I was laying down from my scrap bin.
I carved some of the thin foam more as I went along, hence the ugly looking seam there in the middle, which won’t show after I add fur.
You’ll probably recall that, since the head moves, the spikes had to be very carefully constructed so that this movement wouldn’t be impacted. So, the inside of the second spike (initially I was to make it the first spike but on second consideration looking at the 3D models, its the second spikes that collapses into the third) is carved away to fit the curvature of the third spike, and only the outside edges of the second spike exist to make it appear as though its a complete hair spike. I’ll continue with this illusion when I go to fur this area, adding a strip of fur with a slit down the center of it, to the back of the second spike to cover up the carved out area and for the third spike to partially disappear into.
Around this time I also started to add foam in the gap between where the head moves around the base of the neck (you can see the thin foam behind his ear in the pictures above). This foam has a layer of styrene underneath so ensure it slides over the fur smoothly and easily.
To keep the foam and plastic piece as close to the neck as possible to help hide a seam for movement, I looped some elastic from the head base to the plastic/foam piece. This pulls the piece inward so it rests on the neck instead of sticking out, and because of the smooth styrene backing, it still moves very smoothly and hides the seam well even with just the foam (again, I have a piece of foam on the neck for movement and seam testing).
A did a similar thing to the throat area which you can also see starting behind the fluff under his ear.
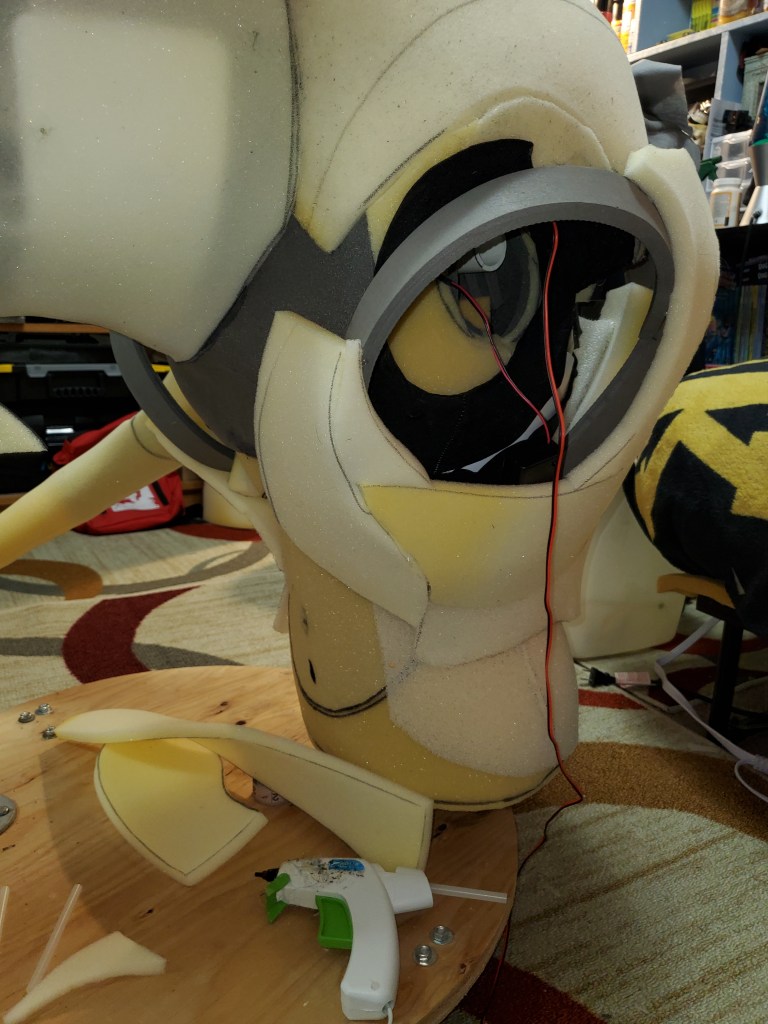
Before I go to add more foam to the neck and fully encase the skeleton (also severely restricting my vision, since I don’t have the diamonds on his neck to see out of yet; that will come later), I want to install the eyes, while I still have access to inside the head. I cut out the roof of his mouth as well to help with this, and for maintenance purposes I will be making this a removable piece (via Velcro), with some of his teeth also attached to this and thus will be removable so I can safely stick my hand inside to either alter the eyes or fix anything with the metal rods inside his head.
I started working with the eyes first by making a paper mockup to find the basic size and placement for the pupil to achieve the following effect. The right-most image shows the EVA cutout of the pupil. The paper eye pattern is slightly larger than his eyesocket so I can glue the final EL panel onto the inside of head. The paper border around it is the actual eye area.
While not having this on the model in-game, I decided to add the little white eye gleam to this character; it seemed to make it pop more and just in general looked a lot better. Artistic liberty!
The first step to finally installing the eye was gluing the border in first. I lined the eye with thin EVA first and then added a layer of styrene on top of that.
After painting, I’m ready to put in the EL panel, and after that was glued in, I glued on the pupil, and voila:
(I should also mention that the white dot on his pupil is painted directly onto the EVA and sealed). The plastic around the eye is also sealed after painting and installing the panel.
After completing the eyes, its time to finish those hair spikes!
I completed these with the grey sand-able foam (slightly more flexible than my similar thickness EVA foam) and filled them with Poly-fil so they’re not totally hollow.
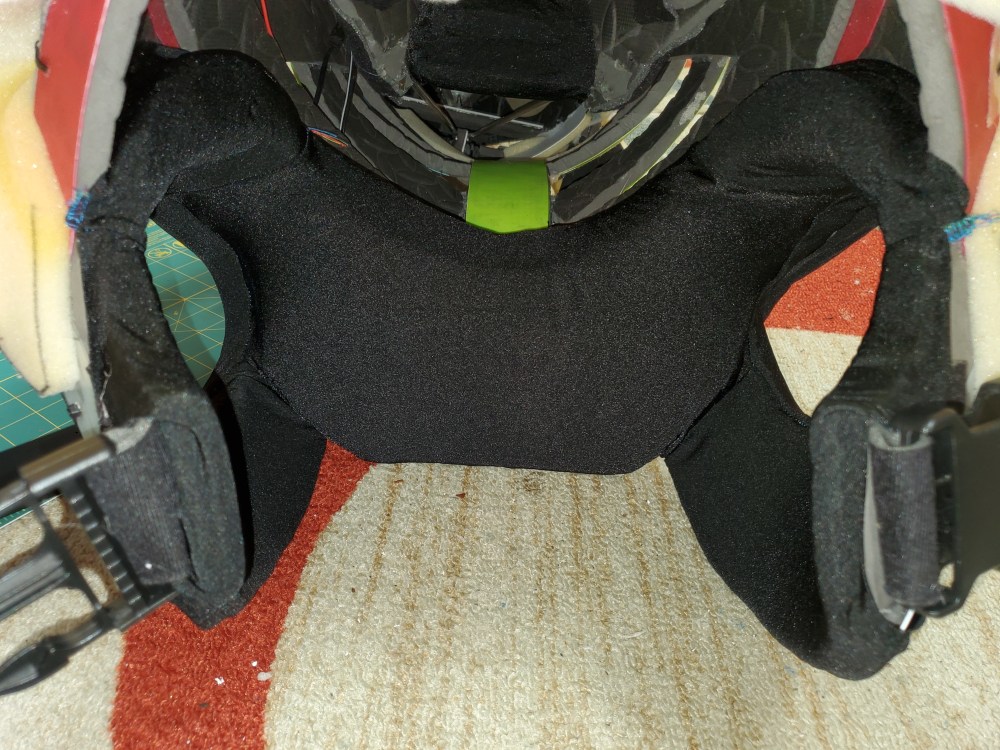
Next up was lining the inside of the chest harness and arm hole areas with foam for comfort and sweat absorbancy. For this I used more reticulated foam, which is highly porous, dries quickly, and is antimicrobial (aka it won’t rot due to yucky stuff). I removed the current padding I had and decided against (for now at least) making a new pocket for a cooling pack, instead layering a single piece of 1″ foam in here. I may revisit that pocket in the future but for now this will be fine.
After installing the foam, I broke out my hand-dandy new serging machine and lined it all, since reticulated foam isn’t the most comfy stuff in the world, and doesn’t slide over most materials very well.
I’d also like to mention here that I slightly altered the arm hole area in a couple of ways. For one, I didn’t like how cramped my head felt inside the neck, so I padded above the shoulders so the whole thing would ride higher on my shoulders. This of course made the helmet, which was attached to the spine via elastic, a little too far up, so I snipped the elastic. It is SO much more comfortable now! I had to remove some of the plastic from below the armhole though now that everything sits higher, because it was cutting into my armpit a little. To make up for that removal, I added a bit more around my chest area. This whole rig doesn’t weigh very much (around 5lbs) but if I still decide on adding the full body harness, this will give me more to attach it to.
Now comes the time I must finish up and complete the neck, forfeiting my visibility for a while. It took me a lot of tinkering, adding of styrene and shaving down to get the neck in some areas to not show evidence of the ribbing, but I finally did it!
You can see the styrene through the foam 😛 but its pretty darn smooth, and I even layered a test piece of fur over it to ensure it was smooth. It very much is!
You can also see a few edits I made to the second hair spike in the second picture, a layer of headliner for smoothing and some styrene for gliding across the fur.
So at this point, his head base is completed! Yay! The next step will be patterning for fur and cutting out the diamonds for visibility. But before I go there, I wanted to add a fun thing: his tongue!
His tongue was fairly simple, but really fun in the end. I used minky fabric for this, and added some magnets to the inside so the tongue can fold up in his mouth and be out of the way. It’s also only attached with a piece of elastic to the bottom jaw, so if someone (inevitably) pulls on it, it will not break the rest of the suit, just pull on the elastic and put some stress on the lower jaw, which is fine.
And that’s just about it for this stage of the project! It sure was A LOT of work, but it was a fun process. Time to start on other things! I already have a bit of playing around done with his hands and feet so I’ll probably tackle those next.
If you have any questions or comments, feel free to leave them below!
The way I pattern costumes for adding fur or skin is quite different than most use (which is the duct tape method). I use felt to make a sort of cover for whatever piece I’m working on, cut as needed (for darts) and then trace that pattern onto the fur backing. This may make more sense with pictures:
A short log post this time just to cover a few alterations and updates I’ve made after my bit of hiatus from this project (a lot going on in my life lately…)
First things first, I reinforced a lot of areas with simple cable ties, and in one area, a plastic screwpost, because I noticed the hot glue doesn’t always hold too well to the plastic pieces. The clear rivet-looking things are the screw posts. I also added some HI styrene sheets to certain mild stress areas (around the harness where it moves slightly upon getting in and out of the suit) and both glued and cable tied them to the EVA foam. This way the glued EVA seams won’t come apart, ever. This will all be lined in the future so it won’t look as ugly!
Cable ties are something a lot of people just think of as temporary solutions, but for things like this they work very well. I will mention however, that I do not recommend them for areas that move excessively and hold weight/stretchregularly. They’re very difficult to break or stretch in general, but the more tension or weight you put on them, the easier they’ll eventually snap or stretch. The areas I’ve placed them here are infrequent (or none at all) stress areas, but with the plastic sheeting and the fact that they’re not actually supposed to stretch or move, rather to ensure the areas DON’T move, the usage will be fine. I’ve very rarely had a cable tie snap, and I use them frequently for both permanent and temporary solutions.
Near the end of the neck, I also added a piece of EVA layered with PVC board for a bit of added horizontal crush reinforcement.
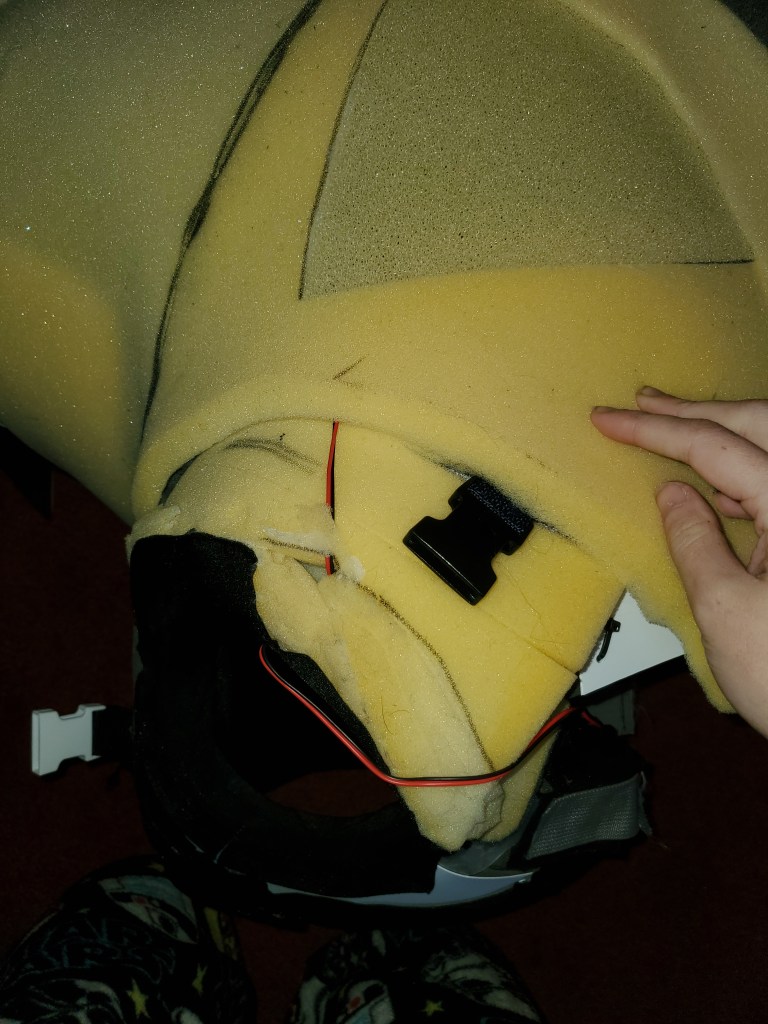
I also installed a removable fan (removable via Velcro) that, because its attached to the bars along the sides of the interior helmet, moves with me as I move my head around. The battery box will be hidden inside the mohawk later on. The fan itself is far up enough to where it does not effect my vision through the mouth, and it’s very quiet.
One of the major things I altered in preparation for foaming is alteration of the area just behind where the head pivots. I removed the last ring of the neck and replaced it with a triangular piece that is curved slightly inward. This curvature allows for the head to still move smoothly and slightly overlap when turned left or right. The main reason I did this was because I started noticing how that last ring was actually being impacted by the sides of the head when it would turn, and I knew this would affect the foaming process and likely look weird when complete.
Also in prep for foaming, and now that there was a huge gap in the throat from removing that last ring and only replacing the top with the triangle, I added a single piece of EVA foam in the throat area that is curved up. This will be to attach the foam to and ensure everything stays flexible around that area, since it will need to overlap smoothly. I may or may not also add some mesh here, depending on how the visibility situation goes.
The final thing I did (besides add the start of the mohawk, which I’ll include in the foaming process) is revise the head shape some by cutting some excess foam and sanding it smooth or thinning it out in certain areas, such as behind his eyes where I thought it stuck out far too much upon revisiting this project. I also shaved down the eyebrow area, end of the muzzle, and part of the mouth to make it more straight instead of curved as much into a smile (it still looks like he’s smiling though :D)
As a side note, yes I sometimes work in my Star Wars pajamas 😛
Next journal entry will be on adding the foam, which I’ve already started on at the time of writing this. Remember to join my Discord server or follow me on Ko-fi for exclusive WIP photos even before I release the next log entry!